Head Inclination Check & Adjustment (CR direction)
Required Tools
- PGPP250 that is more than 16 inches (Premium Glossy Photo Paper(250))
- Scale Loupe (only when adjusting manually)
Estimate Time
Automatic adjustment: Approx. 15 min.
Manual adjustment: Approx. 15 min.
Startup Mode
Repair mode
Standard Values
---
Checking Method
Automatic adjustment
- Start the printer in repair mode. Turn the power on while touching [Screen Center], and keep pressing until the mode select screen is displayed. Touch the center of the panel to start repair mode.
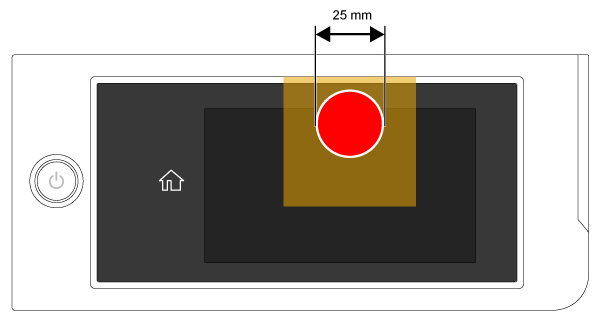
- Set the adjustment media.
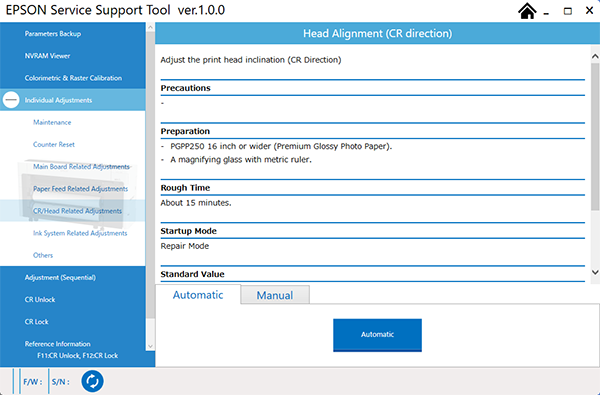
- From the Service Program, select Automatic Adjustment in Head Inclination Check & Adjustment (CR direction).
- Click the [Automatic Adjustment] button. The adjustment pattern is printed.
- After printing, the Ink Mark Sensor will read the pattern, and if adjustment is required, the Head Inclination Adjustment Cam notch number will be displayed.
- If adjustment is not required, then adjustment is completed.Carry out adjustment referring to "Adjustment" section.
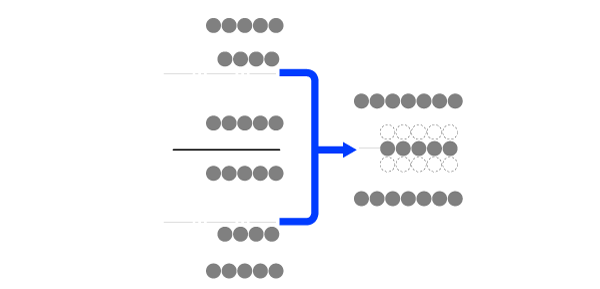
Automatic adjustment pattern
Paper is fed from the direction of the arrow.
Manual adjustment (confirm)
- Start the printer in repair mode. Turn the power on while touching [Screen Center], and keep pressing until the mode select screen is displayed. Touch the center of the panel to start repair mode.
- Set the adjustment media.
- From the Service Program, select Manual Adjustment in Head Inclination Check & Adjustment (CR direction).
- Click the [Print] button. The adjustment pattern is printed.

Check the printed pattern with a Scale Loupe. Check that the gaps in the pattern are even. If the gaps in the pattern are even, then confirmation is complete. If gaps are not even, then carry out adjustment referring to "Adjustment" section.
Adjustment pattern
Paper is fed from the direction of the arrow.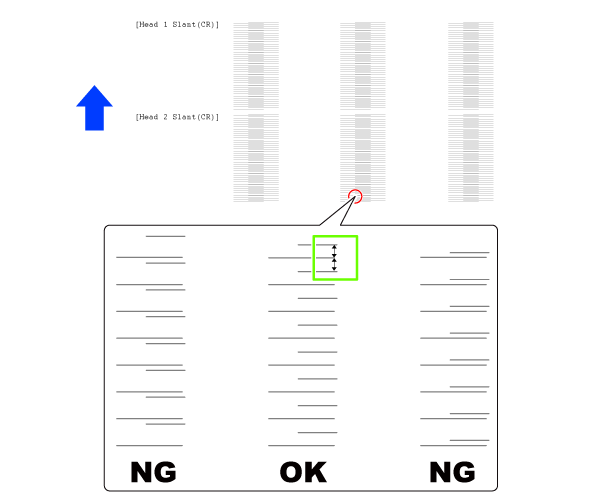
Adjustment
- Ensure the following parts are removed.
Move the CR Unit to the Full side. (If manual adjustment, then unlock the CR Unit from the Service Program before moving.)
- Move the CR Unit (A) so that it contacts the Full side, then loosen the 4 CR Unit screws.
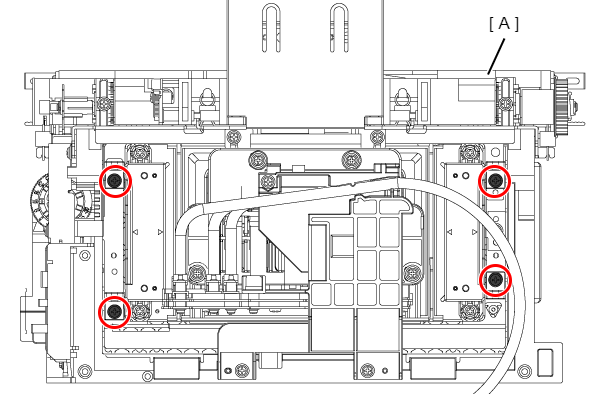
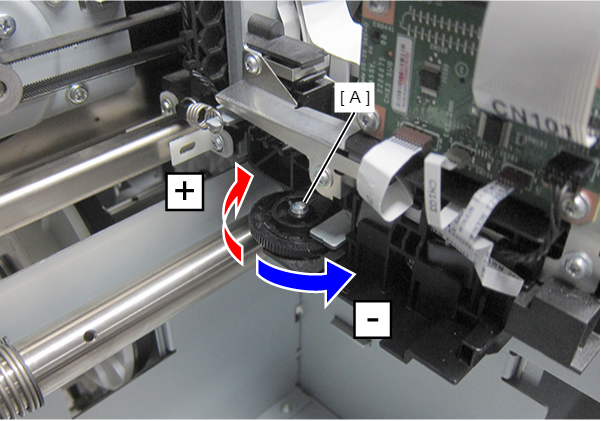
Rotate the Adjustment Cam (A) and adjust the head slant.
Rotate the number of notches displayed in the Service Program.
Ex.) If -6 steps is indicated, then rotate 6 steps in the positive direction (clockwise) (a) so that this becomes "0". Check Point / チェックポイント
- If the Adjustment Cam is hard or does not rotate easily, then further loosen the screws securing the Adjustment Cam.
- If the adjustment cam is difficult to turn by hand, then use tweezers or similar.
- For the direction to rotate the dial, refer to the below.Paper is fed from the direction of the arrow.
When the right lines are raised:(a): Turn counter-clockwise:
When the right lines are lowered(b): Turn clockwise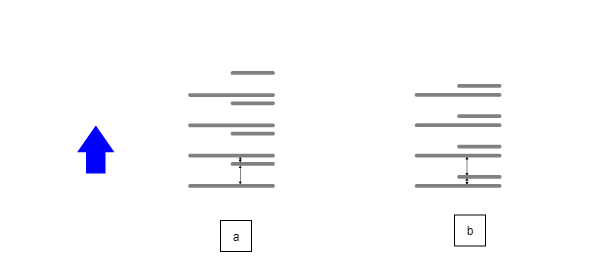
- Turning the Cam by 10 notches moves the line by approximately one dot.
Tighten the 4 CR Unit (A) screws.
If automatic adjustment, click [OK] in the Service Program to lock the CR Unit.
If manual adjustment, then lock the CR Unit from the Service Program.
Repeat adjustment and confirmation of results until adjustment is complete.