Paper Eject Driven Roller Belt
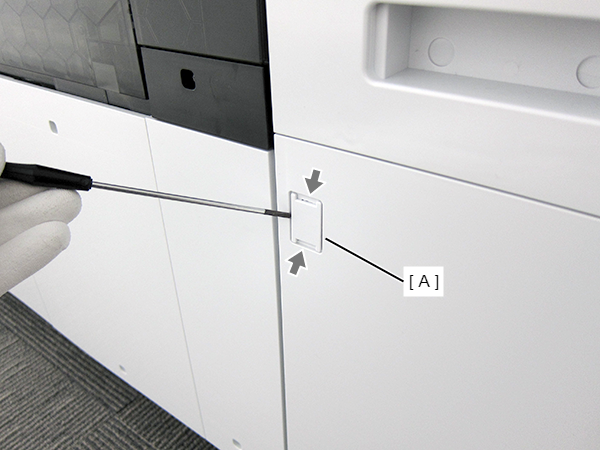
- Insert a flathead screwdriver and release the two hooks, and remove the screw cover (A).
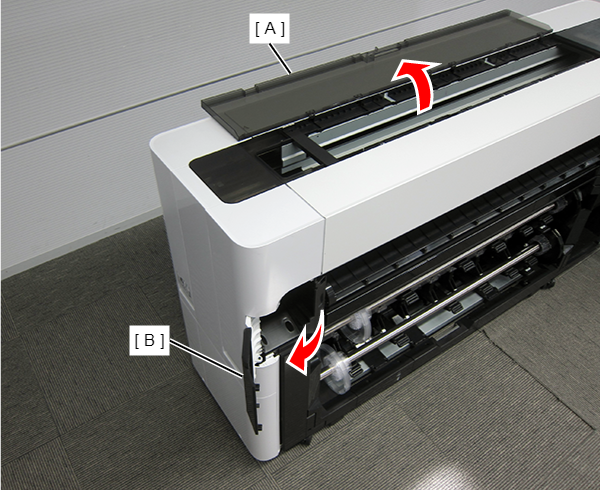
- Open the Printer Cover (A) and the Cutter Cover (B).
- Remove the three screws at the front side.
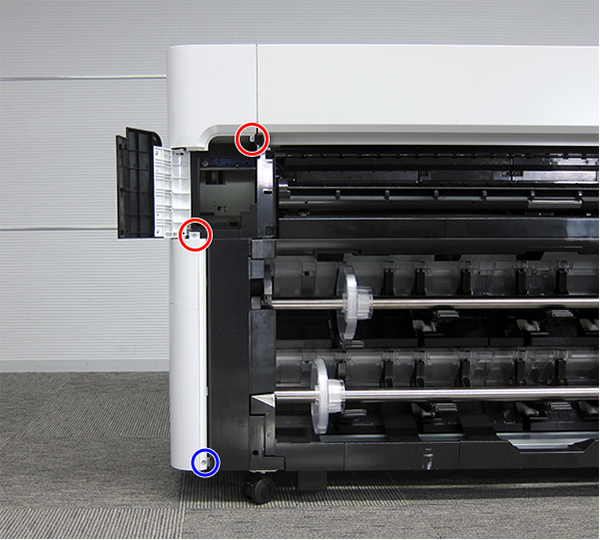
 : Silver M3x10 Cup P-tite screw
 : : Silver M3x8 Cup S-tite screw
- Remove the screw at the top side.
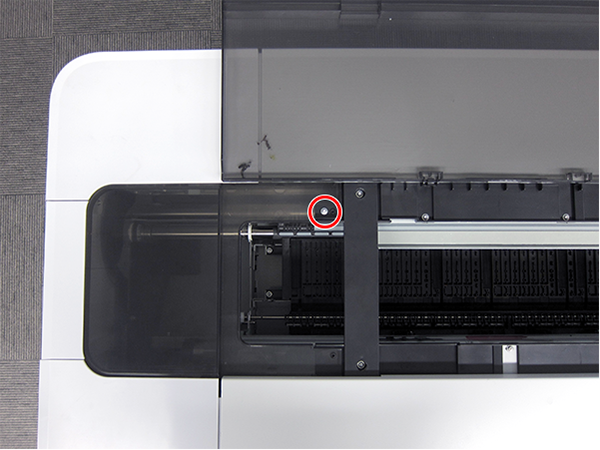
- : : Silver M3x8 Cup S-tite screw
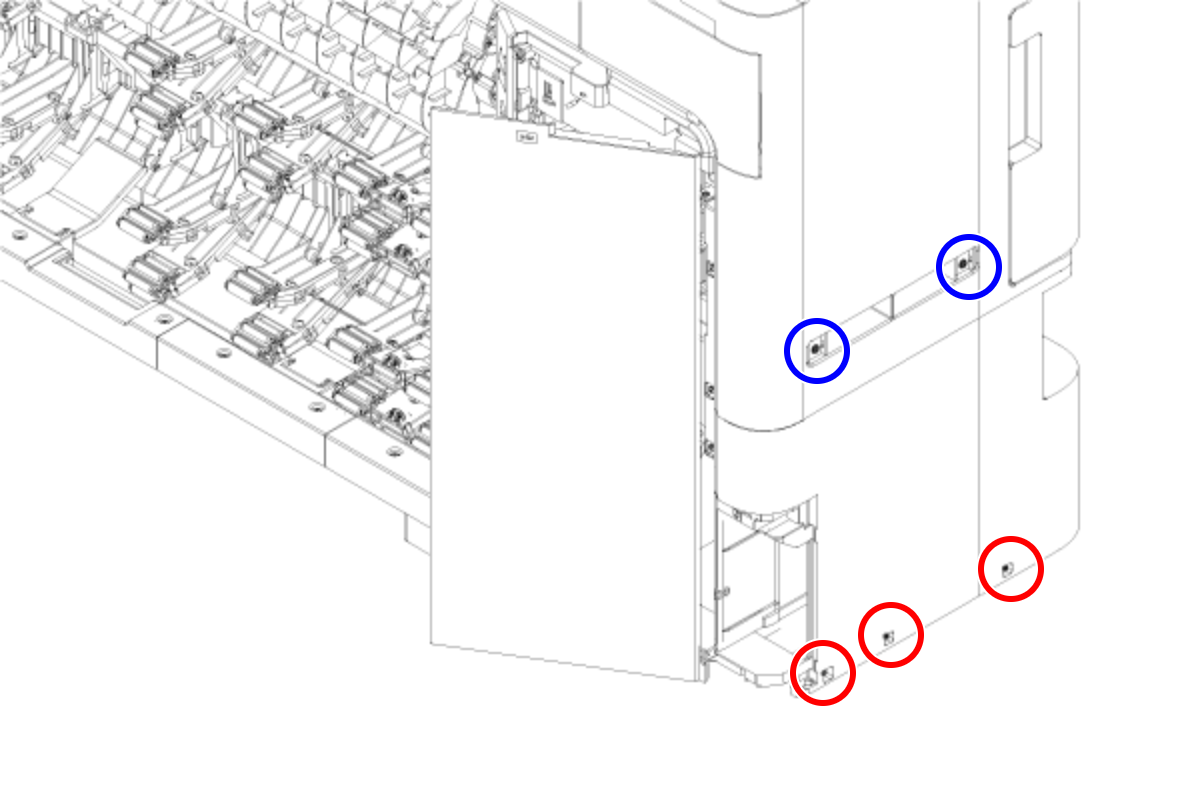
- Remove the four screws at the rear side.
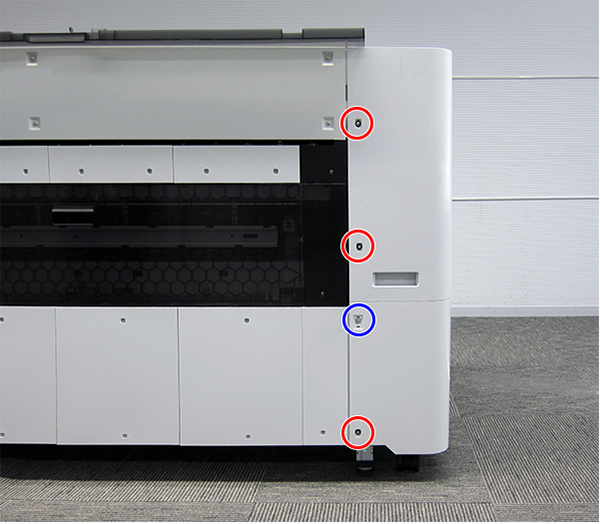
- : Silver M3x8 Cup S-tite screw with plastic washer
- : : Silver M3x8 Cup S-tite screw
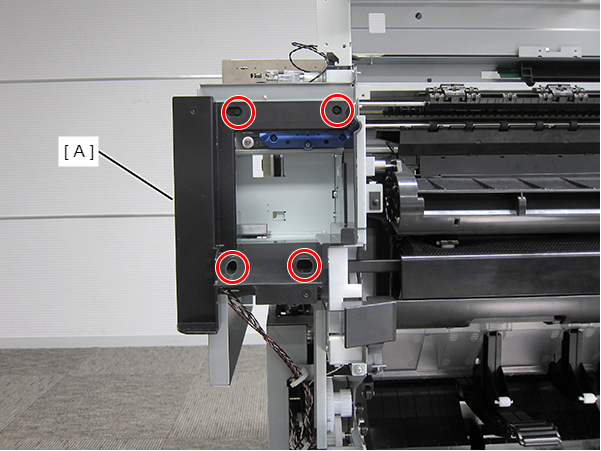
- Remove the four screws at the left side.
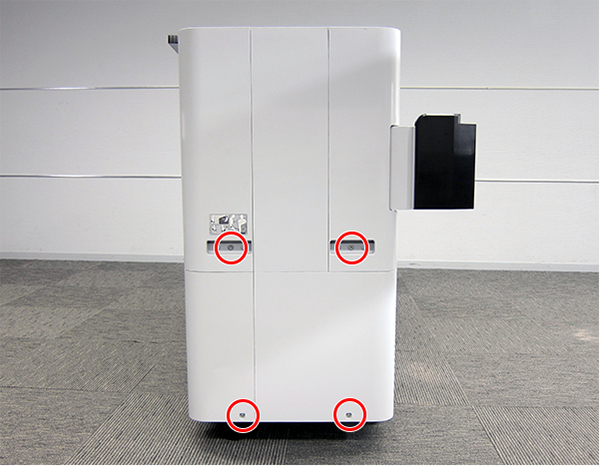
- : Silver M3x8 Cup S-tite screw
- : Silver/M4x8/machine screw
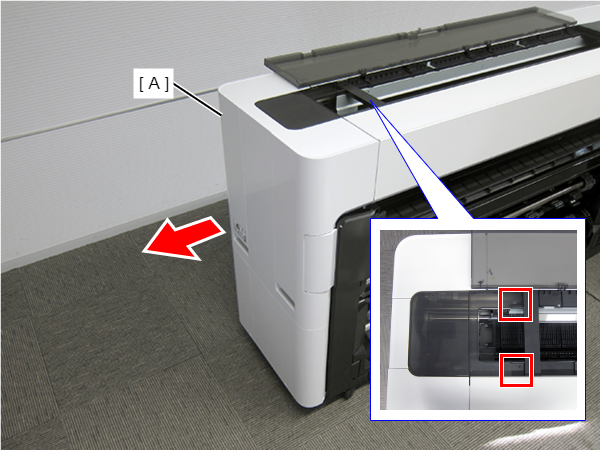
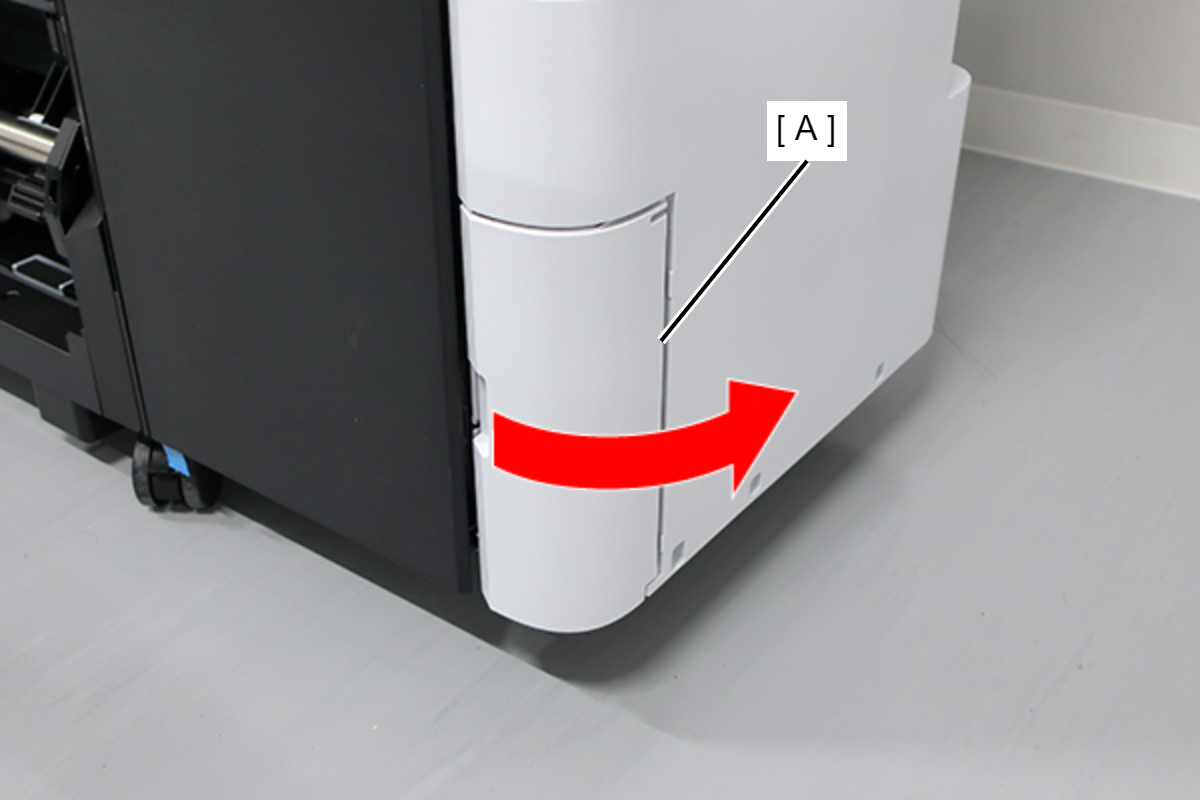
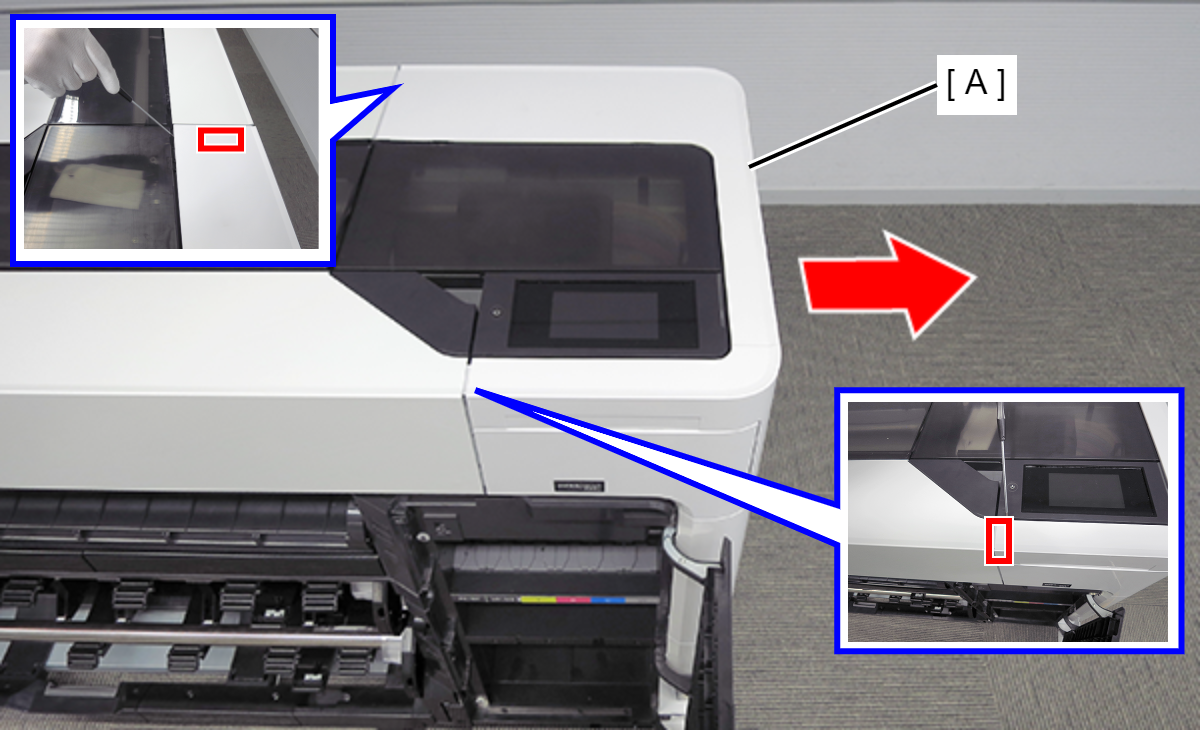
On the printer rear side, release the dowel of the Full Side Cover Unit (A).

Remove the Full Side Cover Unit (A) from the dowels, and remove it while it in the direction of the arrow.
 Assemble / 組み立て
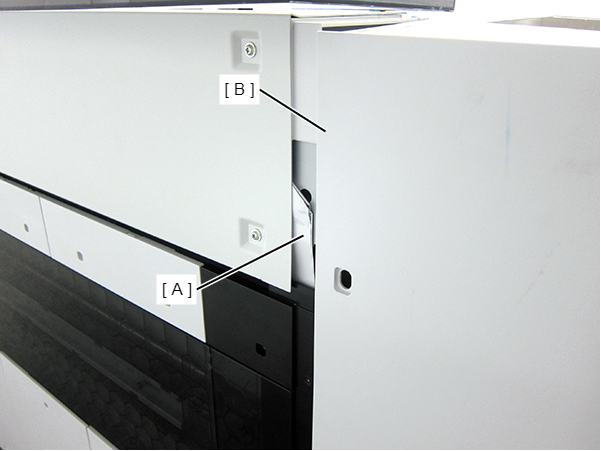
When installing the Full Side Cover Unit (B), carefully the Head FFC (A) so that it does not damage.
- Remove the four screws, then remove the Cutter Maintenance Cover (A).
- : Silver M3x8 Cup S-tite screw
- Remove the four screws and then remove the Housing Support Plate.
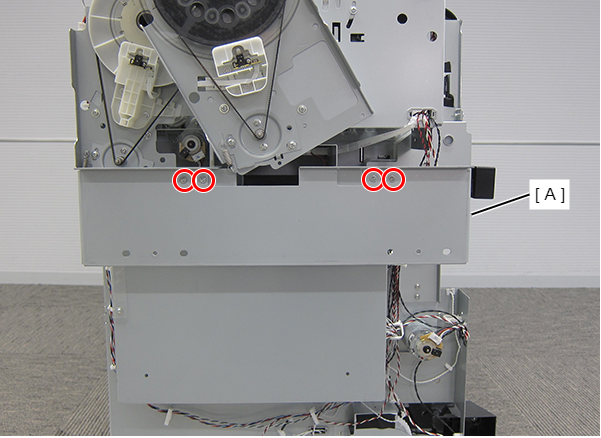
- : Silver M3x8 Cup S-tite screw
- Remove the seven screws and then remove the CH83 Main-B Board Cover (A).
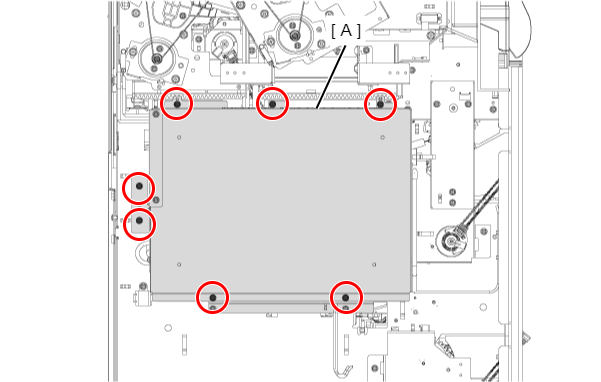
- : Silver M3x8 Cup S-tite screw
Assemble / 組み立てTake care that the cables do not get pinched.
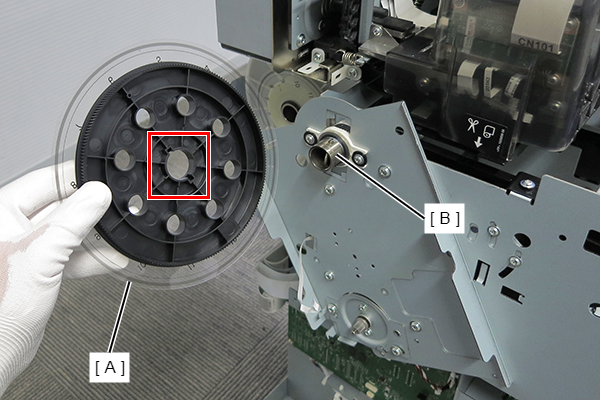
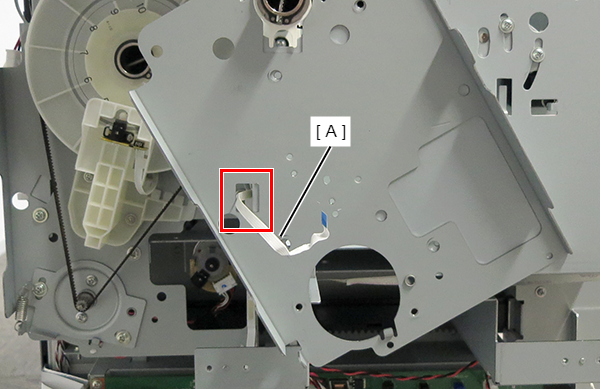
- Remove the spring (PF) (A).
- Loosen the two screws to loosen the PF Belt (B).
Detach the PF Belt (B) from the pinion gear (C) of the PF Motor, and remove the PF Belt (B).
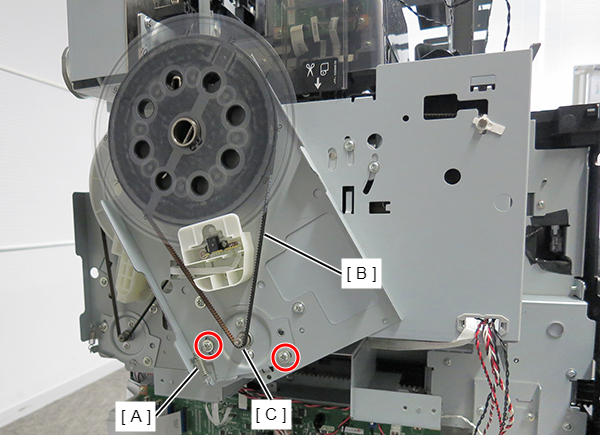
- : Silver M4x8 Cup S-tite screw
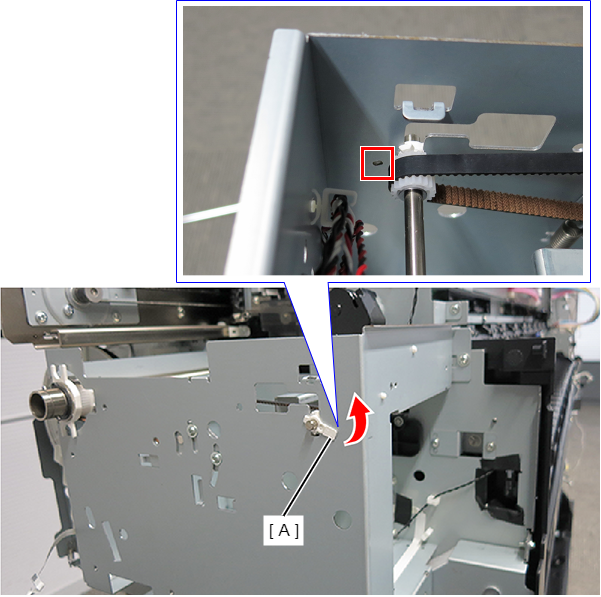
Assemble / 組み立てTo strain the PF Belt properly, follow the procedure below to attach the belt.
- Attach the PF Belt.
- Attach the spring (PF).
- Tighten the two screws.
 Adjustment / 調整
Refer to the following to perform adjustments.
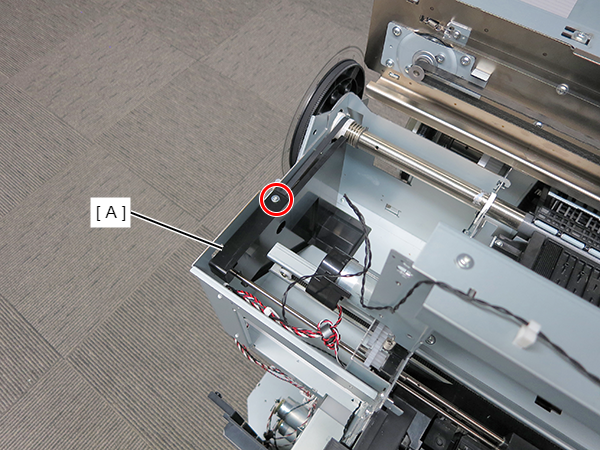
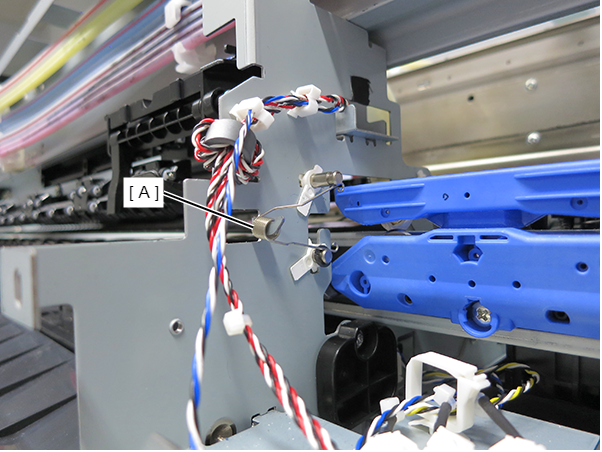
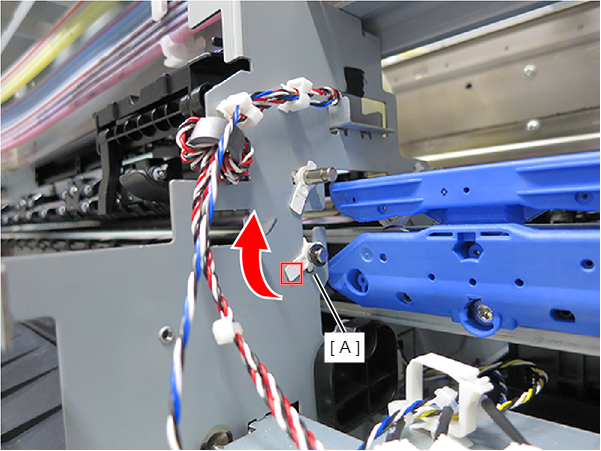
- Release the cable from the two clamps, and then remove the cable from the CH83 Main-B Circuit Board Connector (CN503) (A).
- Remove the two screws, then remove the PF Driven Roller Motor Unit (A).
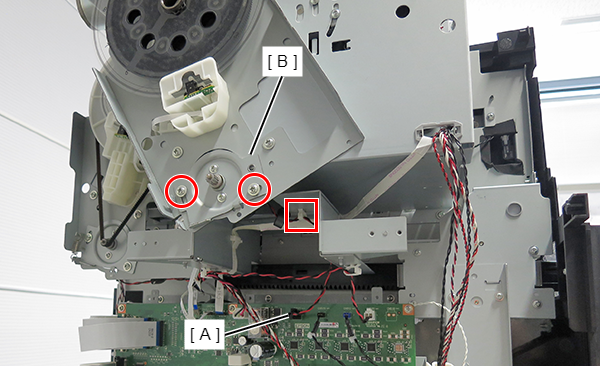
- : Silver M4x8 Cup S-tite screw
- Remove the screw.
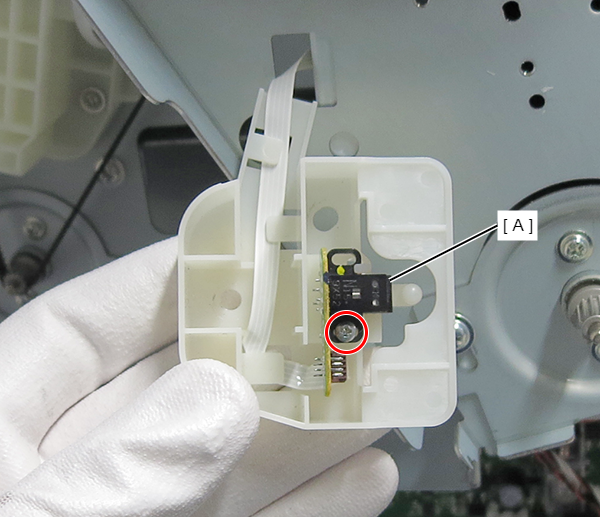
- : Silver M2x6 P-tite screw
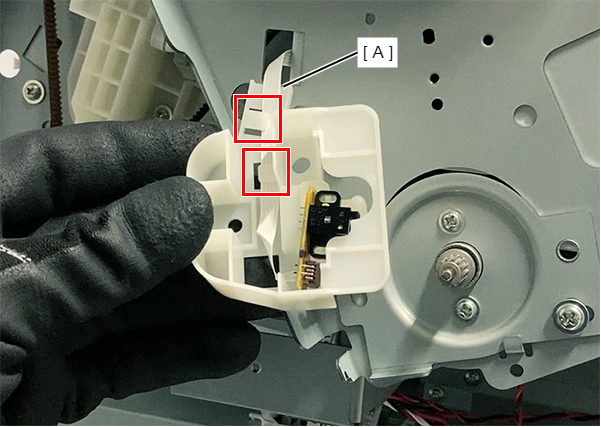
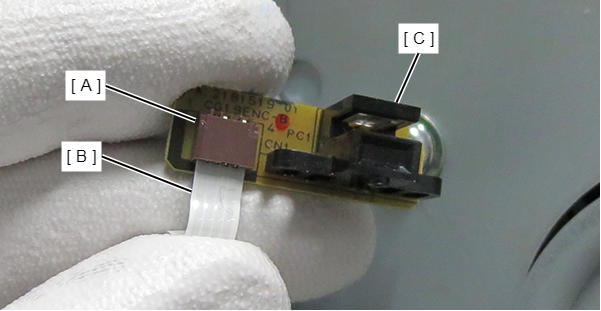
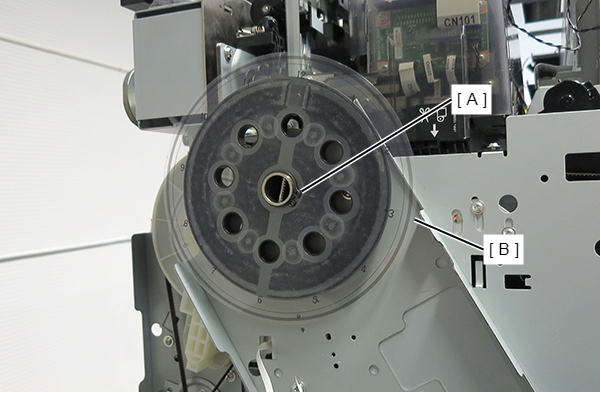
- Disengage the hook and the two dowels on the back side, and detach the PF Scale Encoder (A).
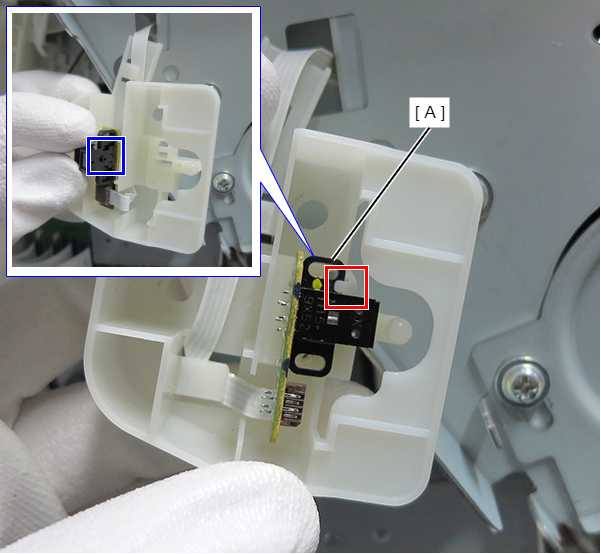
- Release the FFC (A) from the two tabs.
- Remove the FFD (B) from the connector (A), and remove the PF Scale Encoder (C).
Adjustment / 調整Refer to the following to perform adjustments.
- Open the Maintenance Box Cover (A).
- Release the 2 tabs of the Maintenance Box Cover (A) in the order shown in the figure below, and remove.
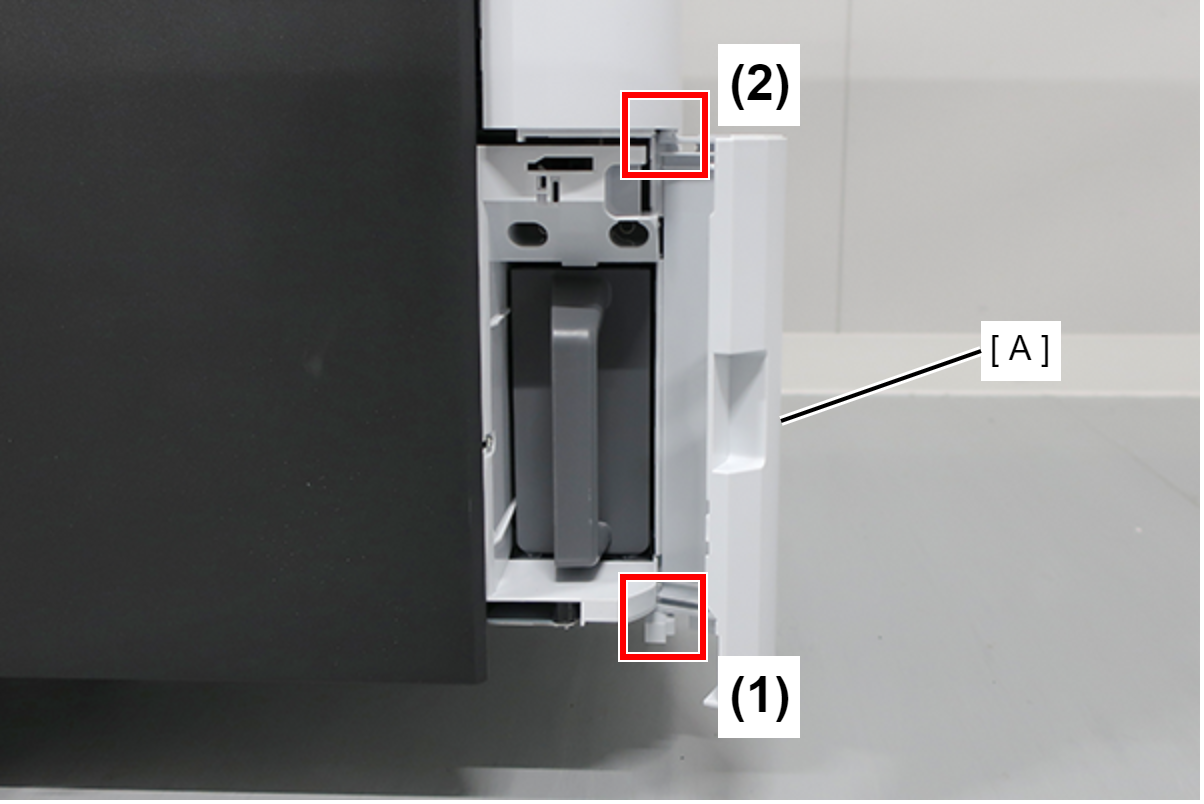
- Remove the Maintenance Box (A).
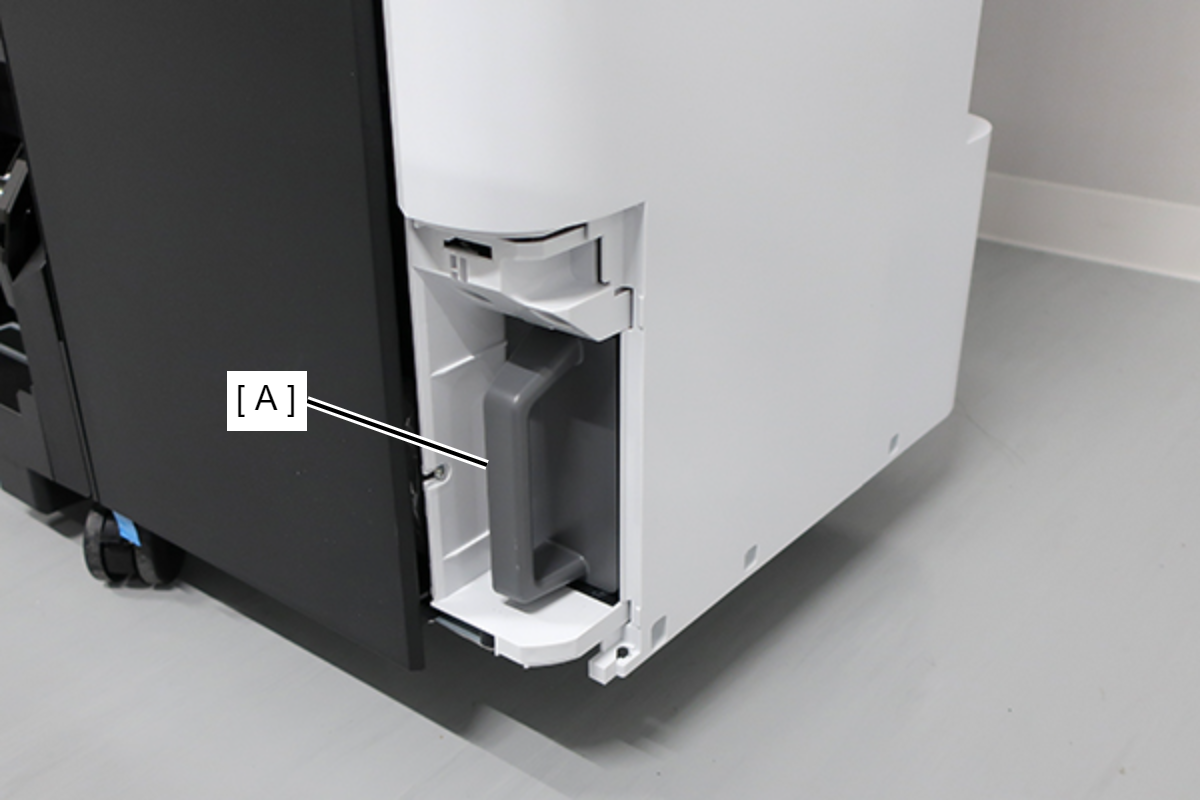
- Remove the screw.
- : : Silver M3x8 Cup S-tite screw
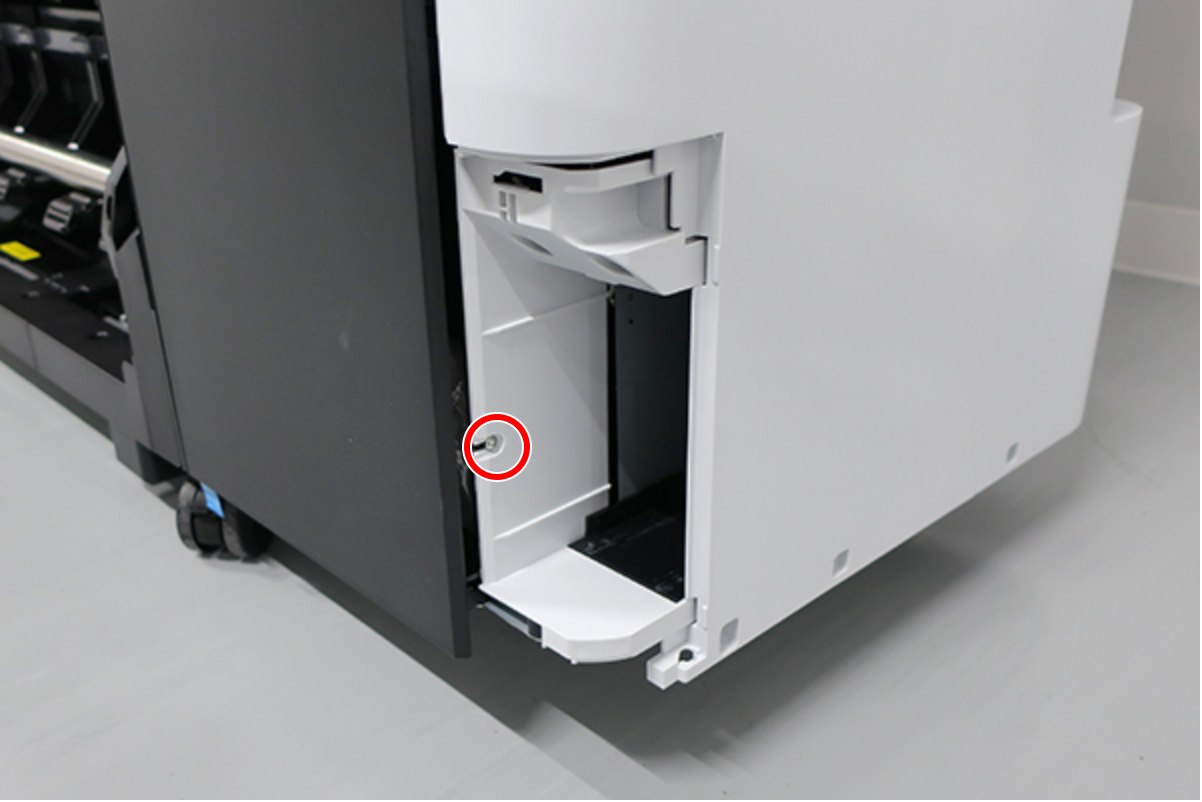
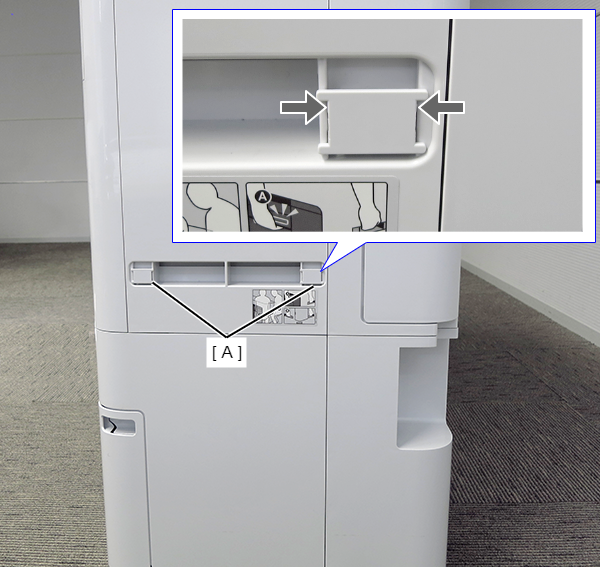
- Insert a flathead screwdriver and release the 2 hooks each, and remove the two screw cover (A).
- Insert a flathead screwdriver and release the 2 hooks, and remove the screw cover (A).
- Remove the three screws at the front side.
- : Black M3x8 Cup P-tite screw
- Remove the five screws at the right side.
- : Silver M3x8 Cup S-tite screw
- : Silver/M4x8/machine screw
- Remove the four screws at the rear side.
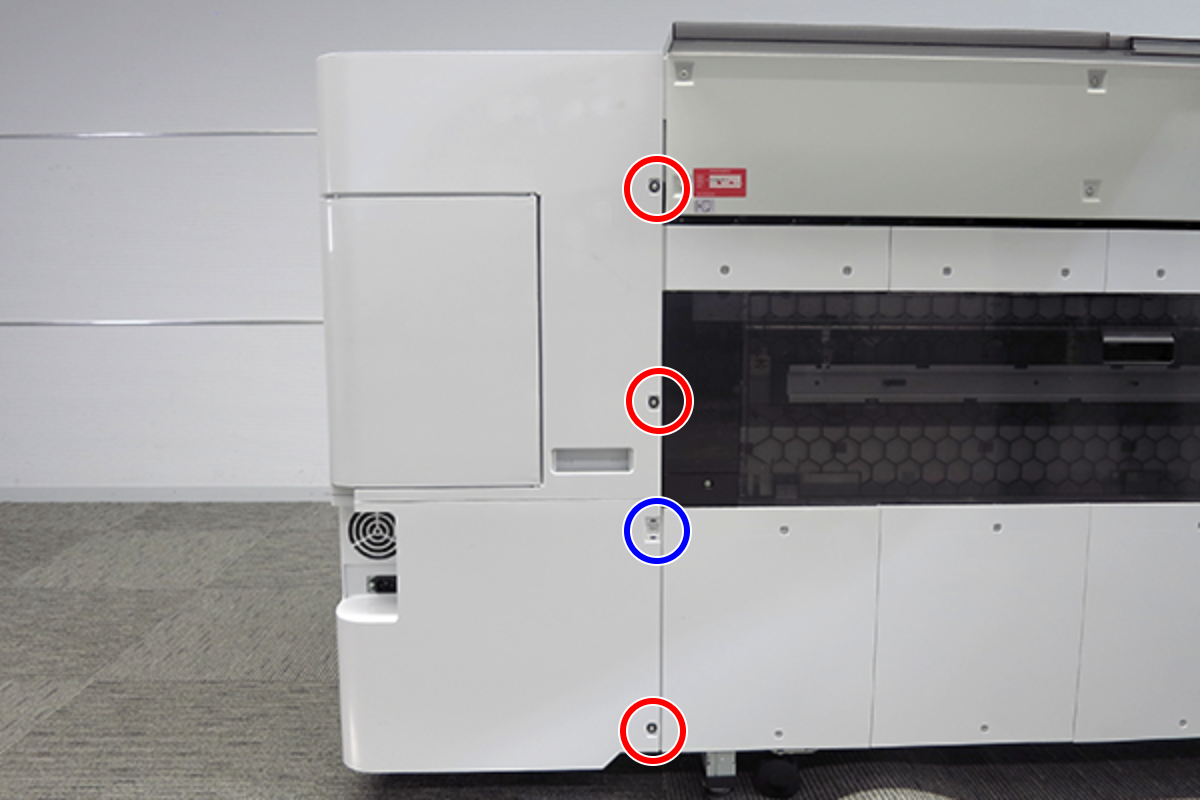
- : Silver M3x8 Cup S-tite screw with plastic washer
- : : Silver M3x8 Cup S-tite screw
- On the printer rear side, release the dowel of the Home Side Cover Unit (A).

- Insert a flathead screwdriver and release the 2 tabs each, and remove the Home Side Cover Unit (A) in the direction of the arrow.
- Remove the C-ring (A).
Remove the PF Scale (B).
 Caution / 注意
If you attempt to greatly tilt the PF Scale to remove it, it may break. When removing and attaching the PF scale, do so by moving it left and right alternately little by little.
Assemble / 組み立てAlign the grooves in the PF Scale (A) with the pin positions on the PF Shaft (B) to install.
 Adjustment / 調整
Refer to the following to perform adjustments.
- Remove the screw and then remove the Paper Eject Release Roller Belt Cover (A).
- : Silver M3x8 Cup S-tite screw
- Remove the six screws.
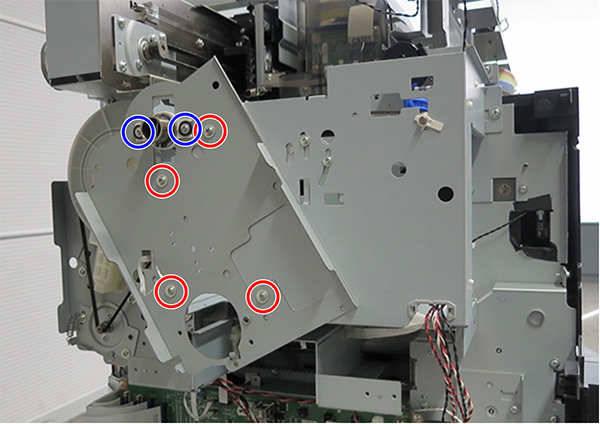
- : Silver M4x8 Cup S-tite screw
- : : Silver M3x8 Cup S-tite screw
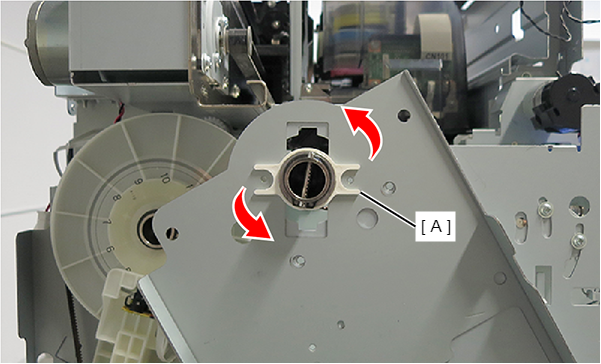
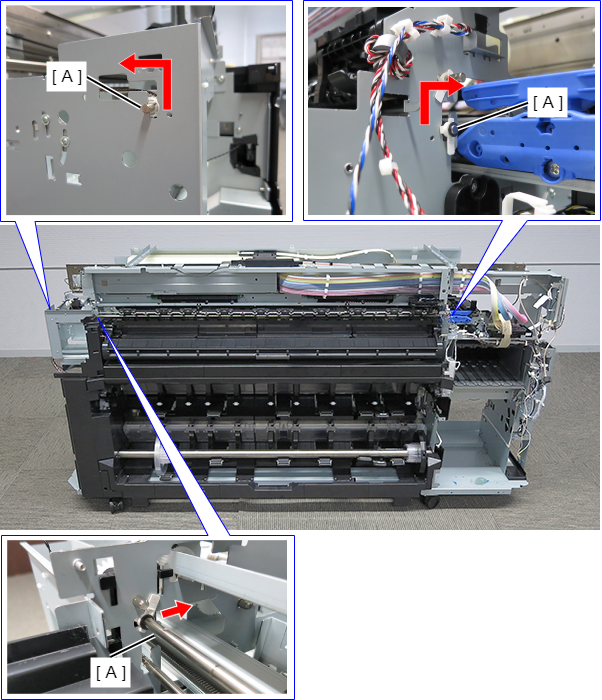
- Turn the PF shaft cam (A) in the arrow direction until it fits inside the hole in the PF plate.
Remove the PF Frame (A).
 Assemble / 組み立て
Make sure to put the FFC (A) through the hole in the PF plate.
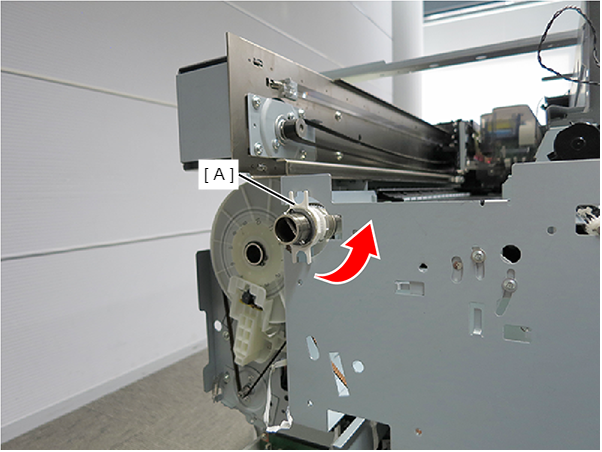
- Disengage the dowel and then turn the bushing ( A) in the arrow direction to remove it.
- Detach the plastic washer (B) from the Paper Eject Release Roller (A).
- Disengage the dowel and then turn the bushing (C) in the arrow direction to detach it from the frame.

- Remove the Tension Spring (A).
- Disengage the dowel and then turn the bushing (A) in the arrow direction to detach it from the frame.
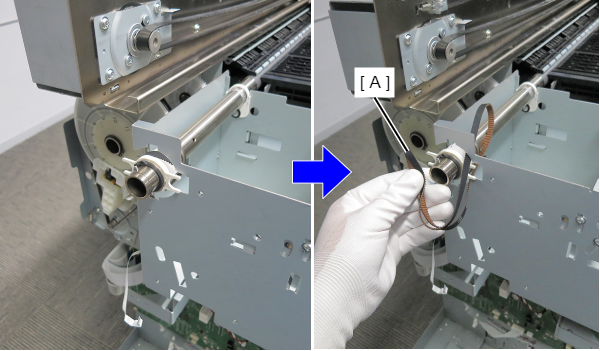
- Detach the Paper Eject Driven Roller Shaft Unit (A) from the three cutouts in the frame.
- Remove the Paper Eject Driven Roller Shaft Unit (A) from the frame, and remove the Paper Eject Release Roller Belt (B).
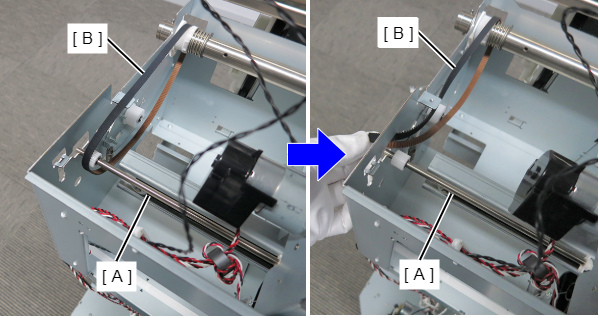
- Turn the PF shaft cam 90 degrees.
Remove the Paper Eject Release Roller Belt (A) through the gap between the cam and the frame.
 Assemble / 組み立て
Rotate the PF gear about two turns and check that the belt is not installed tilted. If it is tilted, correct the belt position. If it is tilted, correct the belt position.
Adjustment / 調整Refer to the following to perform adjustments.
| Adjustment / 調整 |
When removing/replacing this part, refer to following page and make sure to perform the specified operations including required adjustment. |