Uni-D Alignment
Required Tools
PGPP250 that is more than 16 inches (Premium Glossy Photo Paper(250))
Estimate Time
- Automatic adjustment: Approx. 20 min.
- Manual adjustment: Approx. 11 min. (1 time total)
- Breakdown of manual adjustment
1 print: Approx. 6 min.
- 1 time patter confirmation & adjustment: Approx. 5 min. (outward path/inward path each)
1 time total: Approx. 11 min.
- Breakdown of manual adjustment
Startup Mode
Repair mode
Standard Values
---
Step
Automatic adjustment
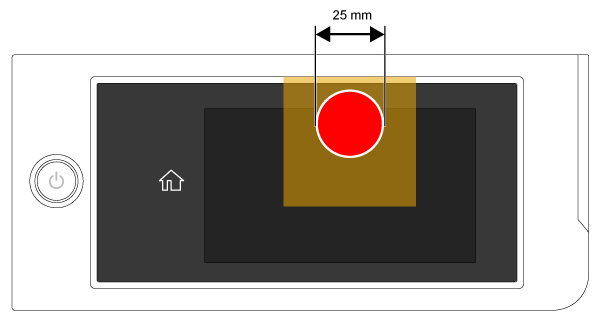
- Start the printer in repair mode. Turn the power on while touching [Screen Center], and keep pressing until the mode select screen is displayed. Touch the center of the panel to start repair mode.
- Set the paper.
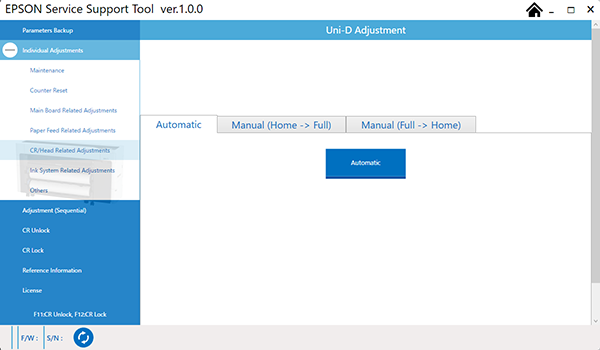
- Start the Service Program, and select Uni-D Adjustment.
Select the [Automatic] tab and click the [Automatic] button to perform automatic adjustment using the ink mark sensor.
- Adjustment pattern
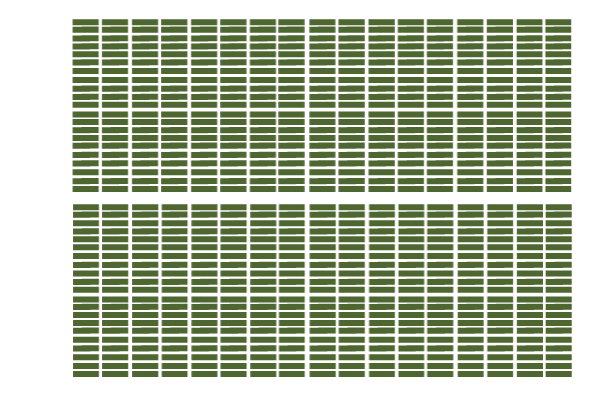
- Adjustment pattern
Manual adjustment
- Start the printer in repair mode. Turn the power on while touching [Screen Center], and keep pressing until the mode select screen is displayed. Touch the center of the panel to start repair mode.
- Set the paper.
- Start the Service Program, and select Uni-D Adjustment.
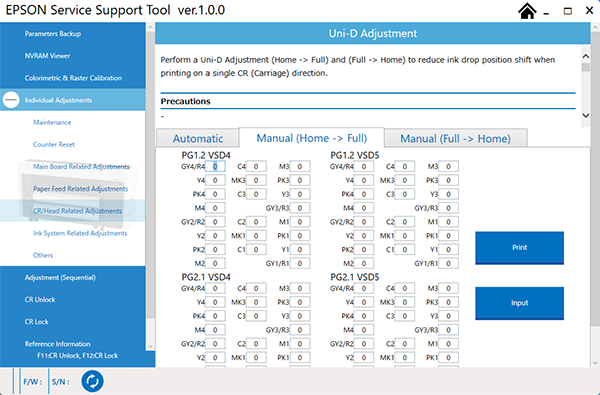
Select the [Manual (Home -> Full)] tab and click the [Print] button to print the adjustment pattern.
 Check Point / チェックポイント
The adjustment pattern is printed in the following order.
- PG1.2
VSD4 -> VSD5 - PG1.6
VSD4 -> VSD5
- PG1.2
Check the GY4 adjustment pattern in the first pattern line.

Choose the pattern with the least gaps between colors.
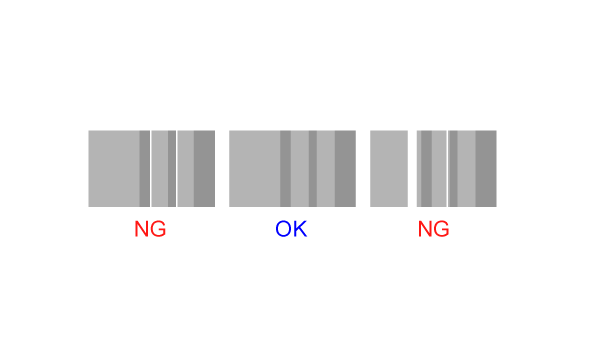
After confirming the adjustment patterns for all the remaining columns in the same manner and selecting the pattern with the least gaps between colors, write the number in the input field.
Click [Input] after finished entering in all numbers.
Click the [Print] button to check whether the adjustments are optimized.
If readjustment is required, print the adjustment pattern and perform the adjustment again.
- Perform [Manual (Full -> Home)] in the same procedure.