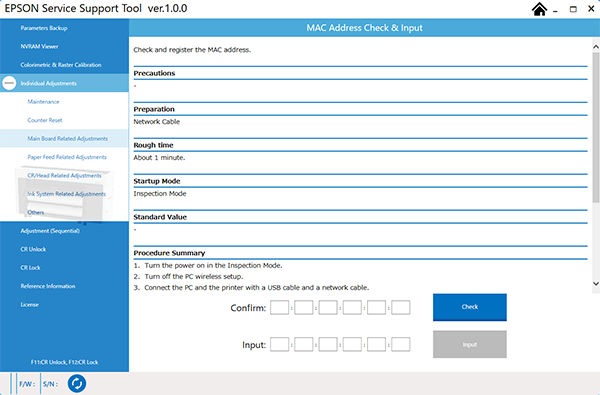
MAC Address Check & Input
Required Tools
Network cable
Estimate Time
Approx. 1 min.
Startup Mode
Repair mode
Standard Values
---
Step
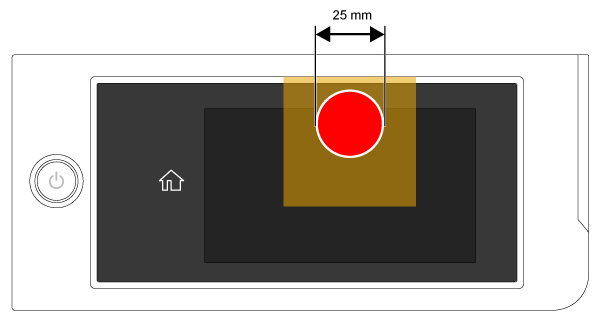
- Start the printer in repair mode. Turn the power on while touching [Screen Center], and keep pressing until the mode select screen is displayed. Touch the center of the panel to start repair mode.
Start the Service Program Perform, and select MAC Address Check & Input.
- Disable wireless connection on the PC.
Connect the PC and the printer with a USB and network cables.
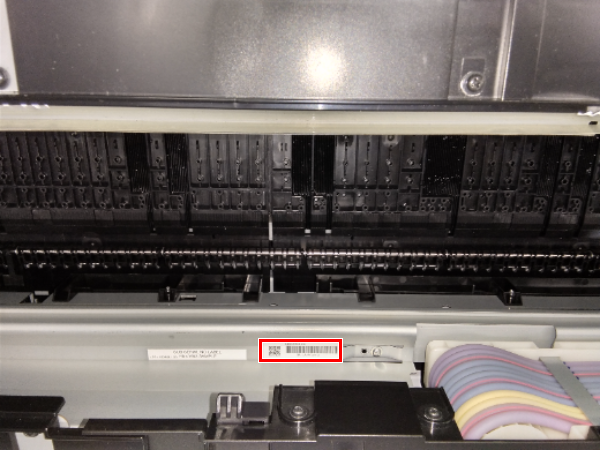
Enter the MAC address printed on the label near the center of the printer top cover (at the position shown in the photo).
Click [Input] to write the MAC address to the printer.
Click [Check] to display the set MAC address. Check that the address is correct.