Ink cartridge cover
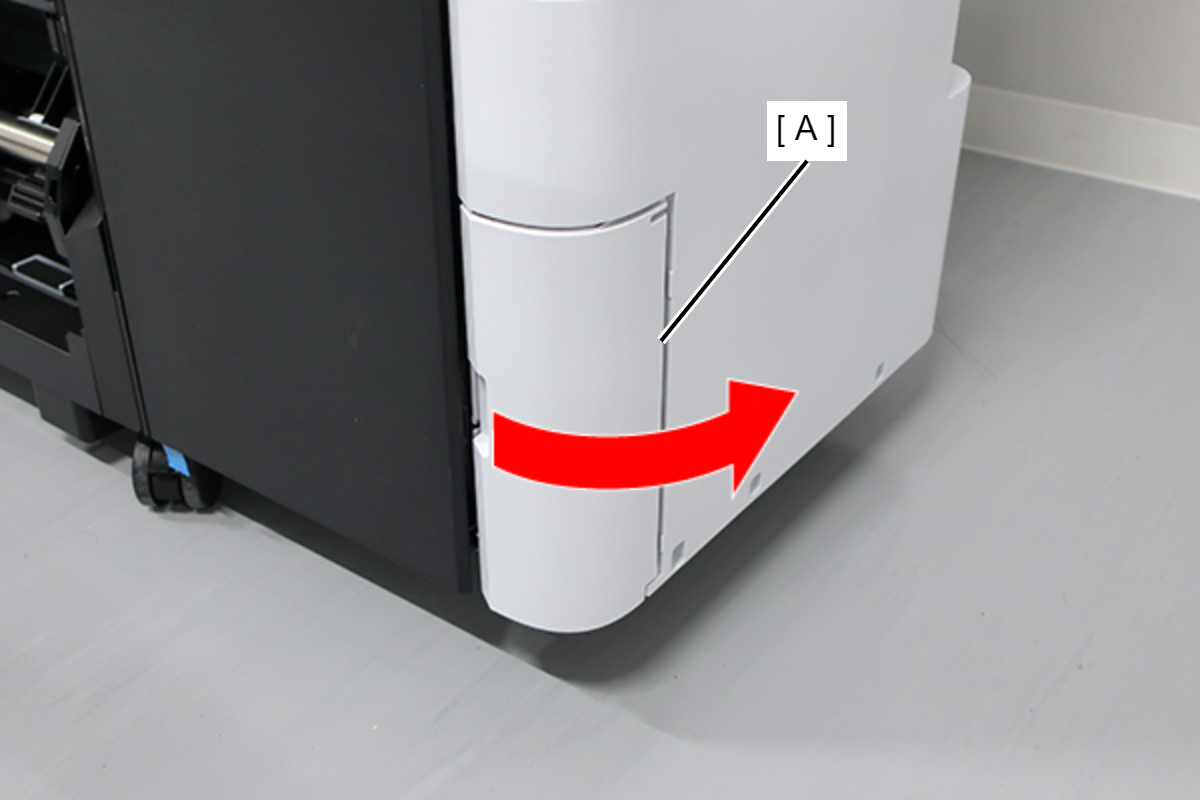
- Open the Maintenance Box Cover (A).
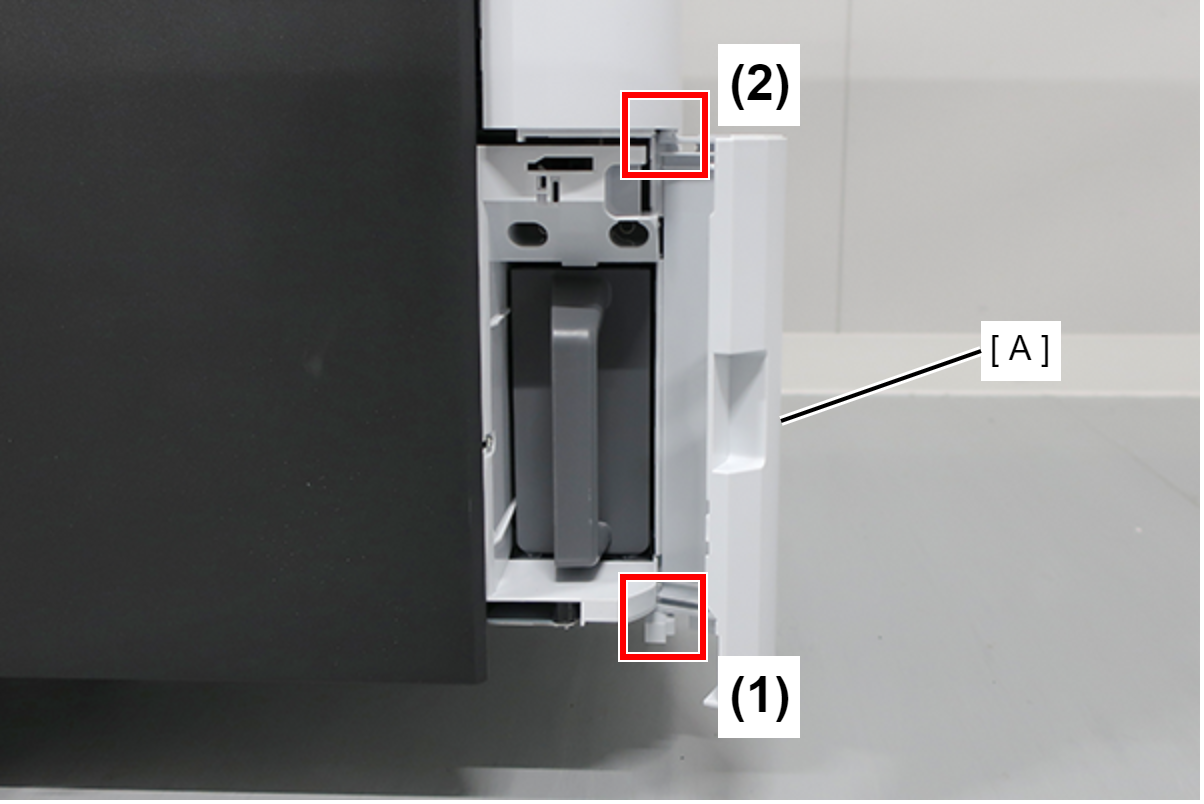
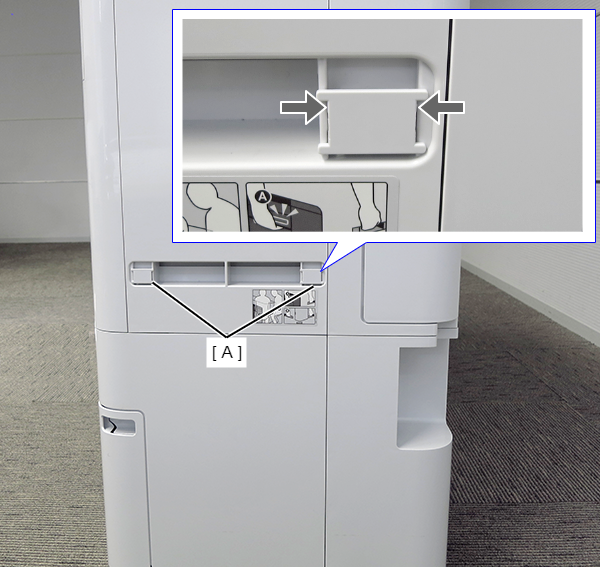
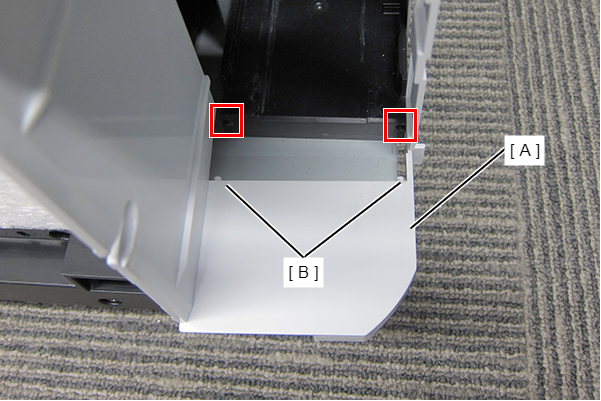
- Release the 2 tabs of the Maintenance Box Cover (A) in the order shown in the figure below, and remove.
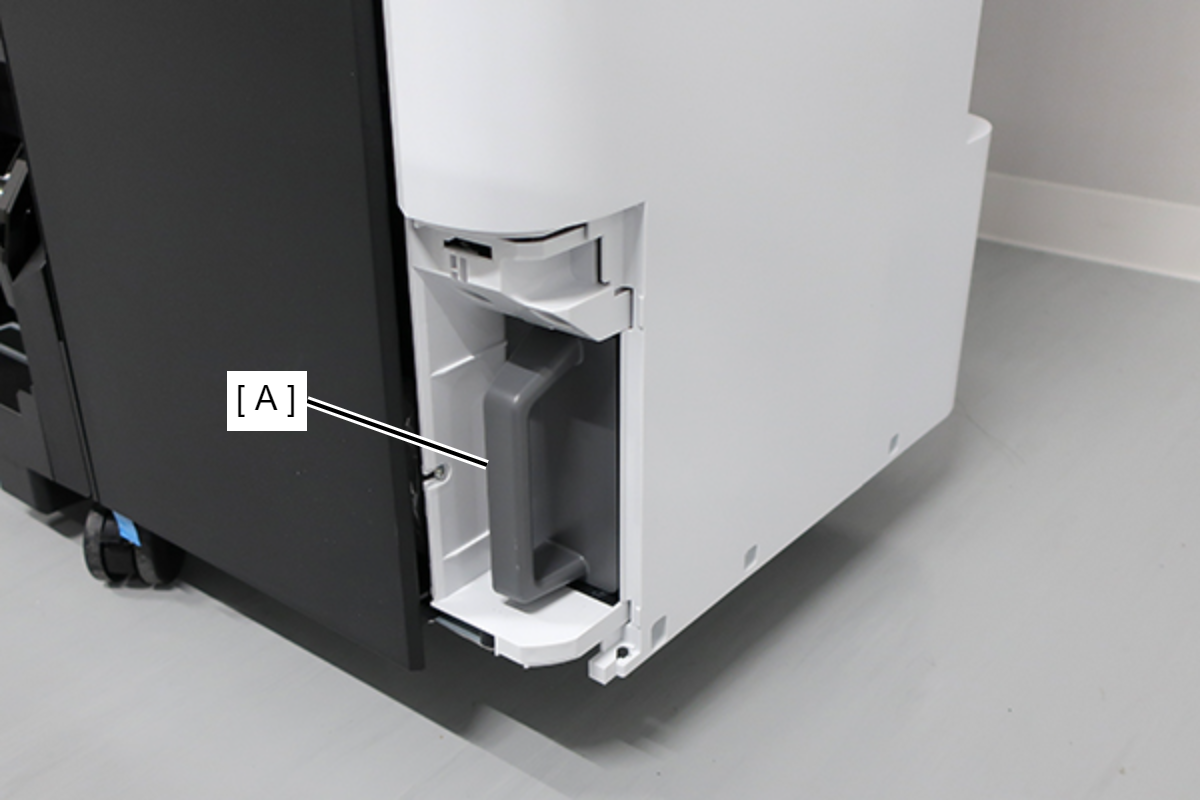
- Remove the Maintenance Box (A).
- Remove the screw.
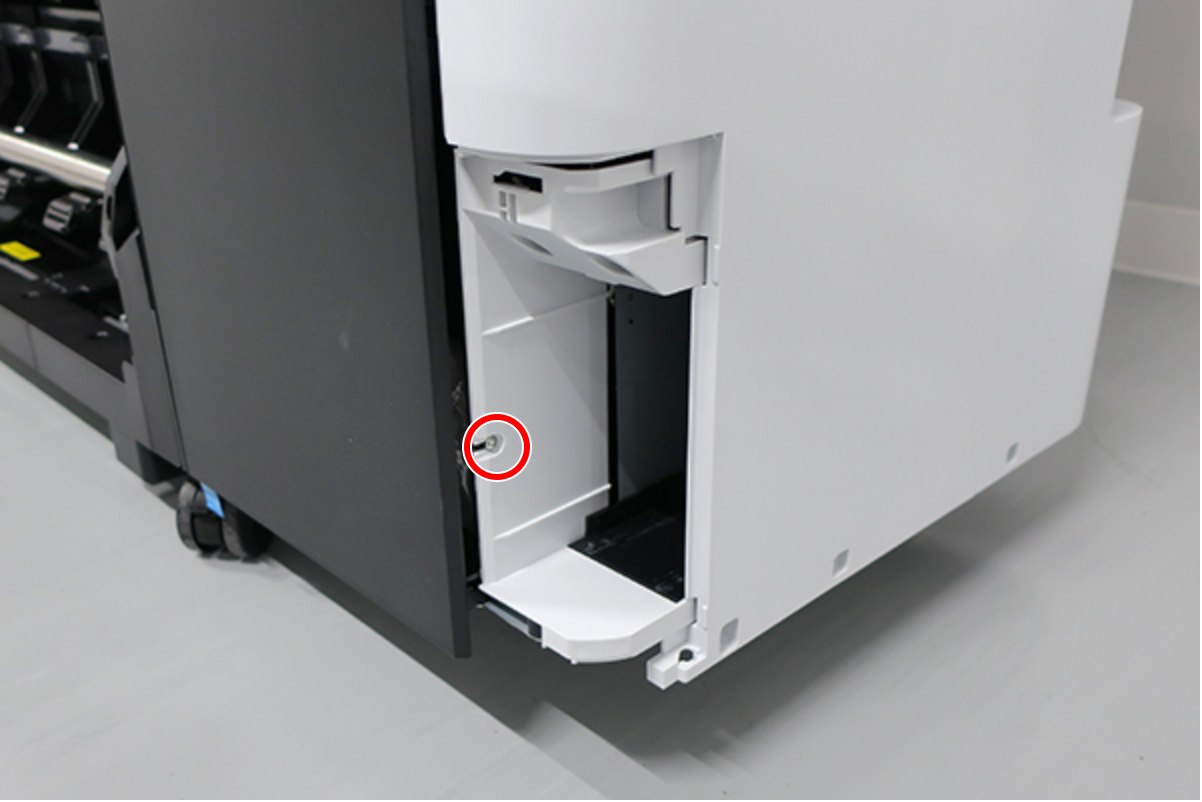
 : : Silver M3x8 Cup S-tite screw
- Insert a flathead screwdriver and release the 2 hooks each, and remove the two screw cover (A).
- Insert a flathead screwdriver and release the 2 hooks, and remove the screw cover (A).
- Remove the three screws at the front side.
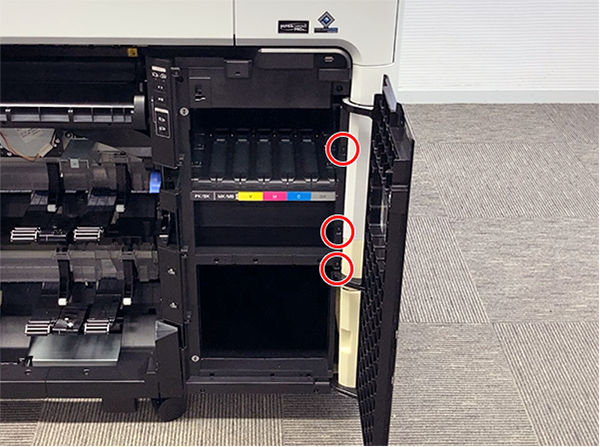
- : Black M3x8 Cup P-tite screw
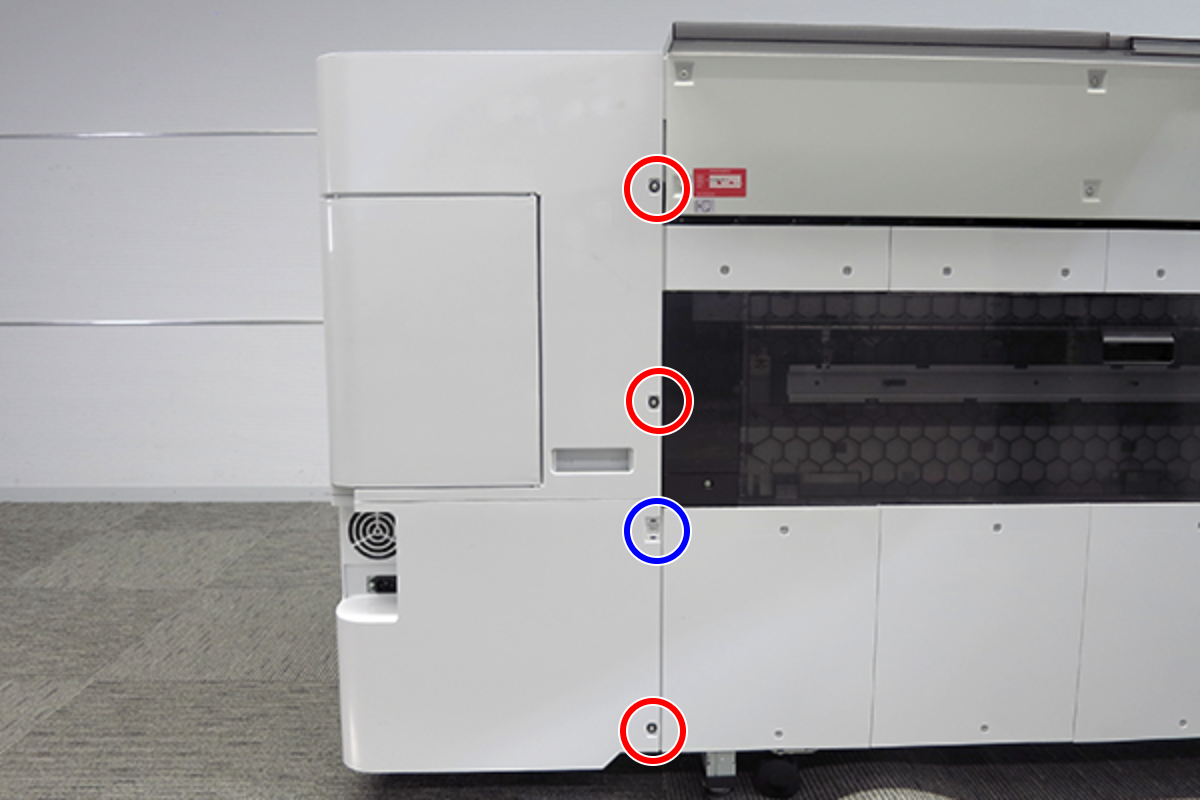
- Remove the five screws at the right side.
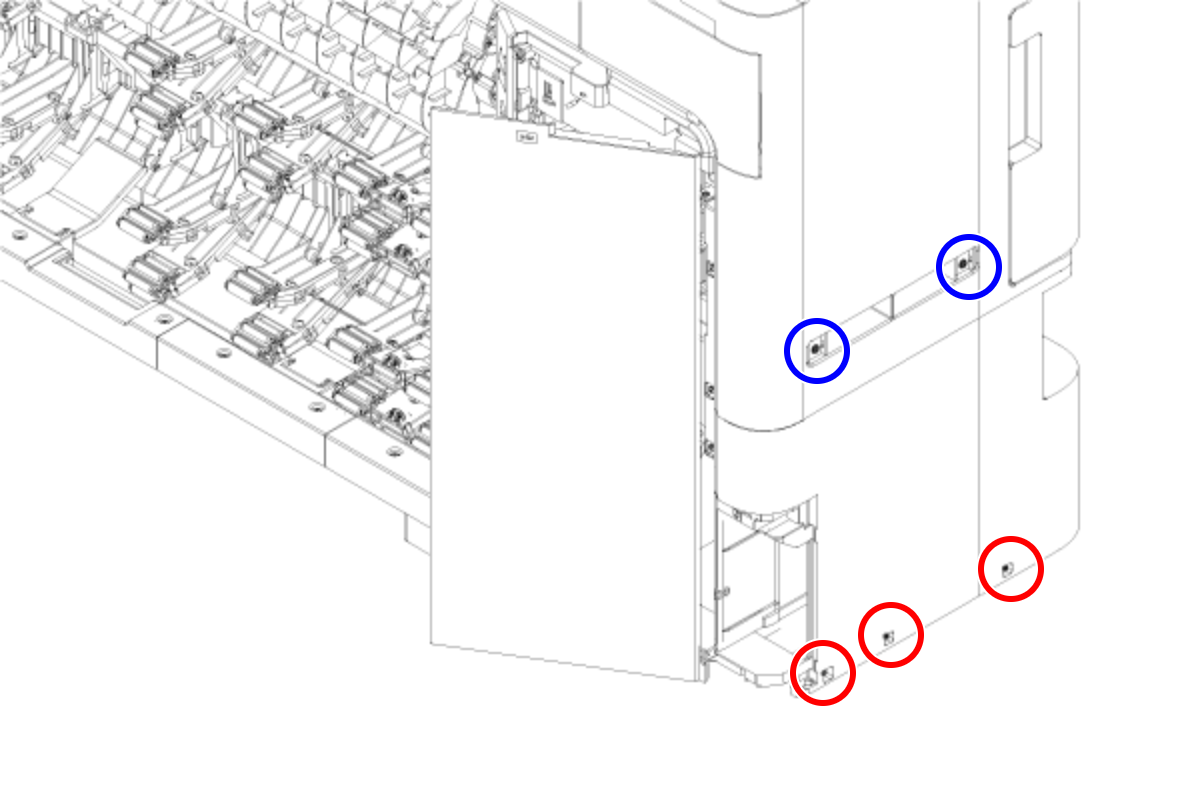
- : Silver M3x8 Cup S-tite screw
 : Silver/M4x8/machine screw
- Remove the four screws at the rear side.
- : Silver M3x8 Cup S-tite screw with plastic washer
- : : Silver M3x8 Cup S-tite screw
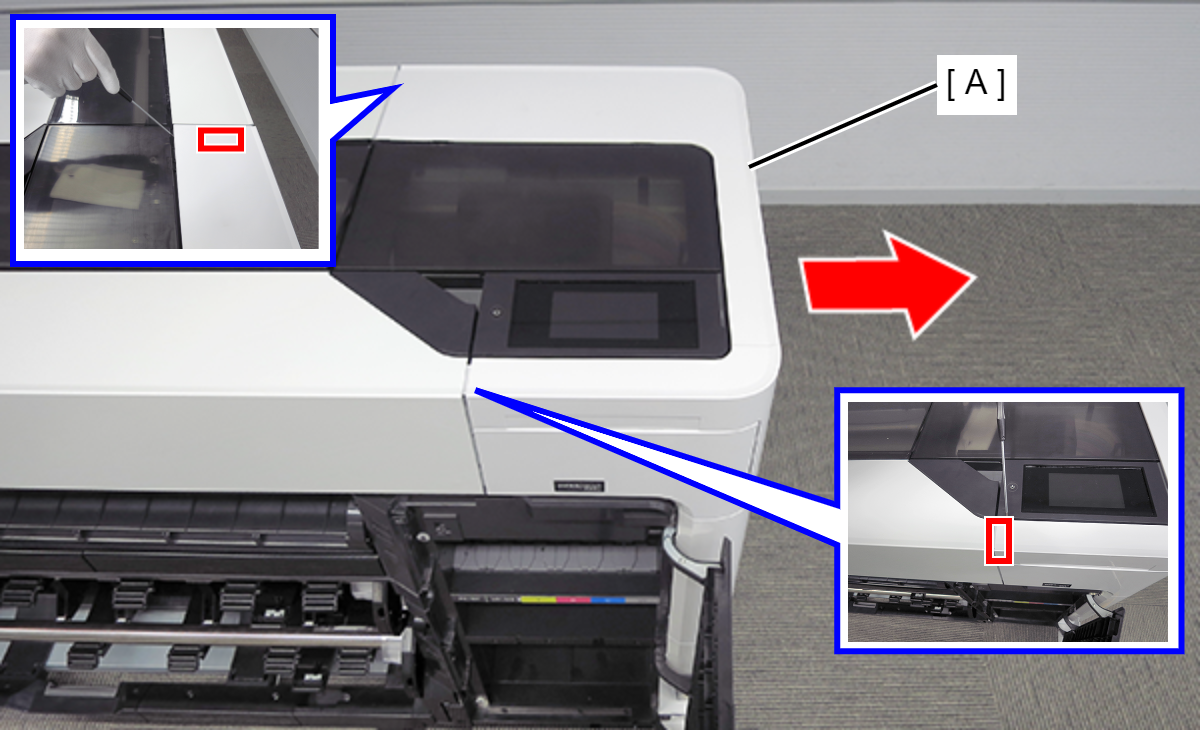
- On the printer rear side, release the dowel of the Home Side Cover Unit (A).

- Insert a flathead screwdriver and release the 2 tabs each, and remove the Home Side Cover Unit (A) in the direction of the arrow.
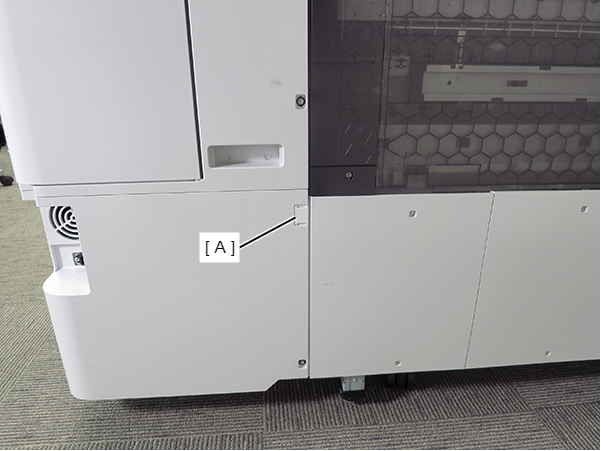
Remove the two screws, and remove the Maintenance Cover (A).

- : : Silver M3x8 Cup S-tite screw
- Remove the cable (B) from the relay connector (A).
Release the cable (B) from three clamps.
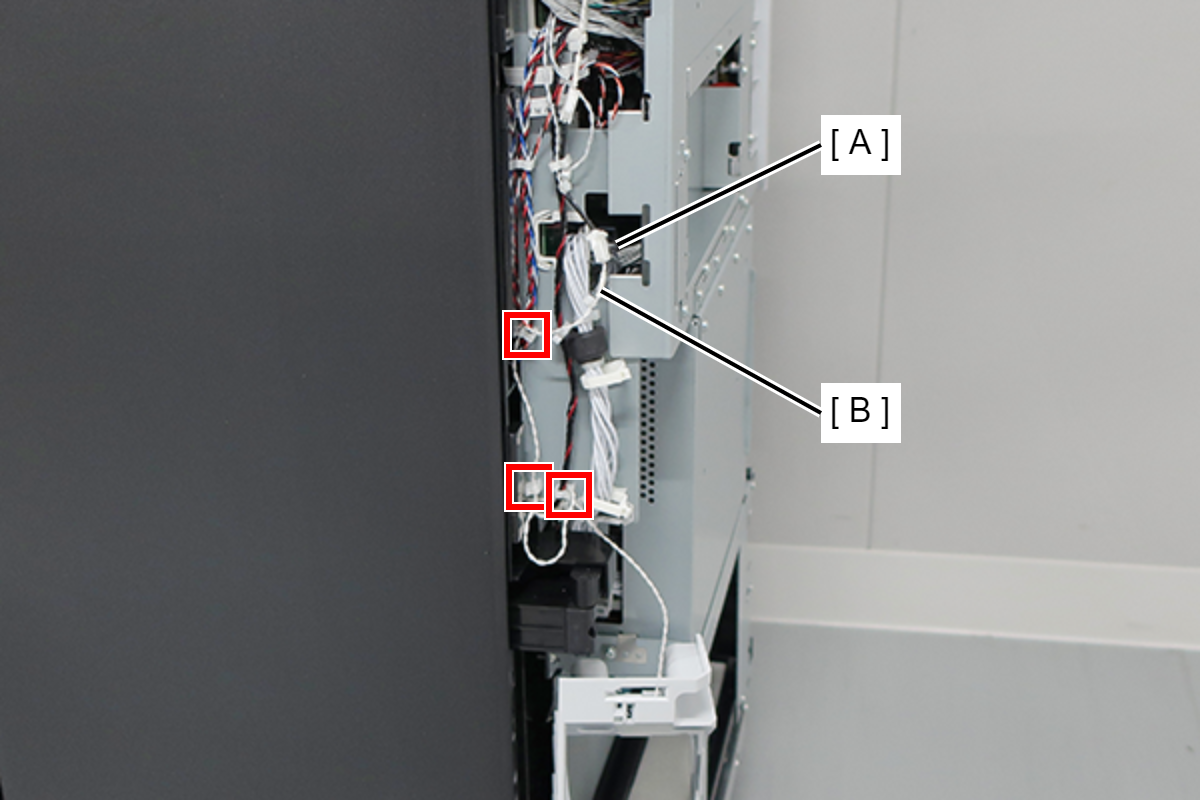
 Check Point / チェックポイント
If the cable/clamp is covered with a plastic sheet, work while avoiding the plastic sheet.
 Assemble / 組み立て
- Push the two dowels (A) of the Maintenance Cover (A) in the positioning holes of the case.
- Push the two dowels (A) of the Maintenance Cover (A) in the positioning holes of the case.
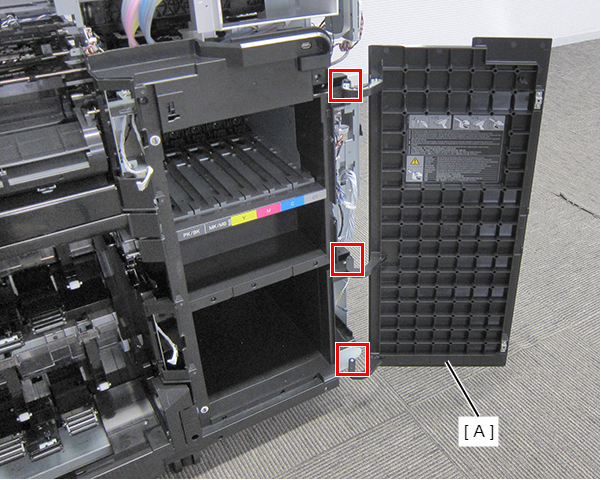
- Detach the Ink Ink Cartridge Cover (A) from the three shafts. (Only perform for SC-P8500D series/SC-T7700D series/SC-T5700D series/SC-P6500D series/SC-P6500DE series/SC-T3700D series/SC-T3700DE series/SC-P6500E series/SC-T3700E series/SC-P8500DM series/SC-T7700DM series/SC-T5700DM series)