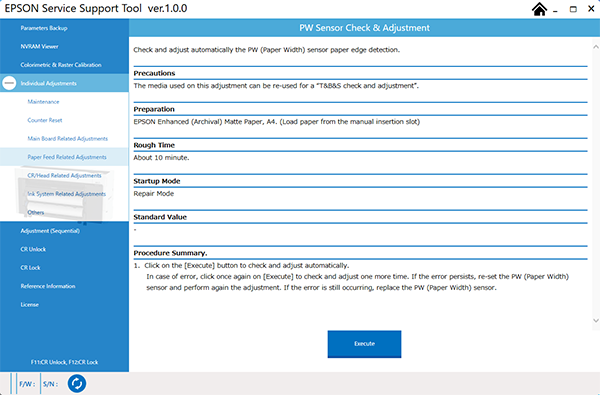
PW Sensor Check & Adjustment
Required Tools
Photo Matte Paper/pigment exclusive use A4
Estimate Time
Approx. 10 min.
Startup Mode
Repair mode
Standard Values
---
Step
- Start the printer in repair mode. Turn the power on while touching [Screen Center], and keep pressing until the mode select screen is displayed. Touch the center of the panel to start repair mode.
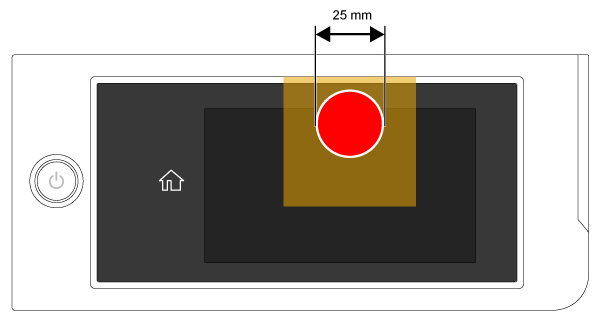
Set the paper.
Start the Service Program, and select PW Sensor Check & Adjustment.
Click the [Execute] button, and check the message display.
- If adjustment has been correctly completed: Go to step 7.
- If [NVRAM read data and acquired data do not match. Please try again]: Go to step 5.
- If [Adjustment failed. Please check printer status]: Go to step 6.
- This may indicate an abnormality with the PW Sensor installation, therefore ensure this is installed correctly. After installation, recheck at Step 4.
- Perform Step 4. If there is an abnormality, then replace the CR Sensor Assy (IMS/PW), and return to Step 4.
- Follow the panel display to eject the paper and finish the adjustment, then turn the printer OFF.