NVRAM Data Backup & Restore
Required Tools
---
Estimate Time
- Backup: Approx. 4 minutes 30 seconds
Restore
<Printer Main Circuit Board>Part 1 Restore (Setting Value): Approx. 20 seconds
Part 2 Restore (NW/Authentication data): Approx. 8 minutes
<Scanner Main Board >
Part 1 Restore (Setting Value): Approx. 1 minute 30 seconds
Part 2 Restore (NW/Authentication data): Approx. 8 minutes
<Printer Main Circuit Board and Scanner Main Board >
Part 1 Restore (Setting Value): Approx. 2 minutes
Part 2 Restore (NW/Authentication data): Approx. 8 minutes
Startup Mode
- Backup: Repair mode
- Restore: Inspection mode
Standard Values
---
Step
Backup
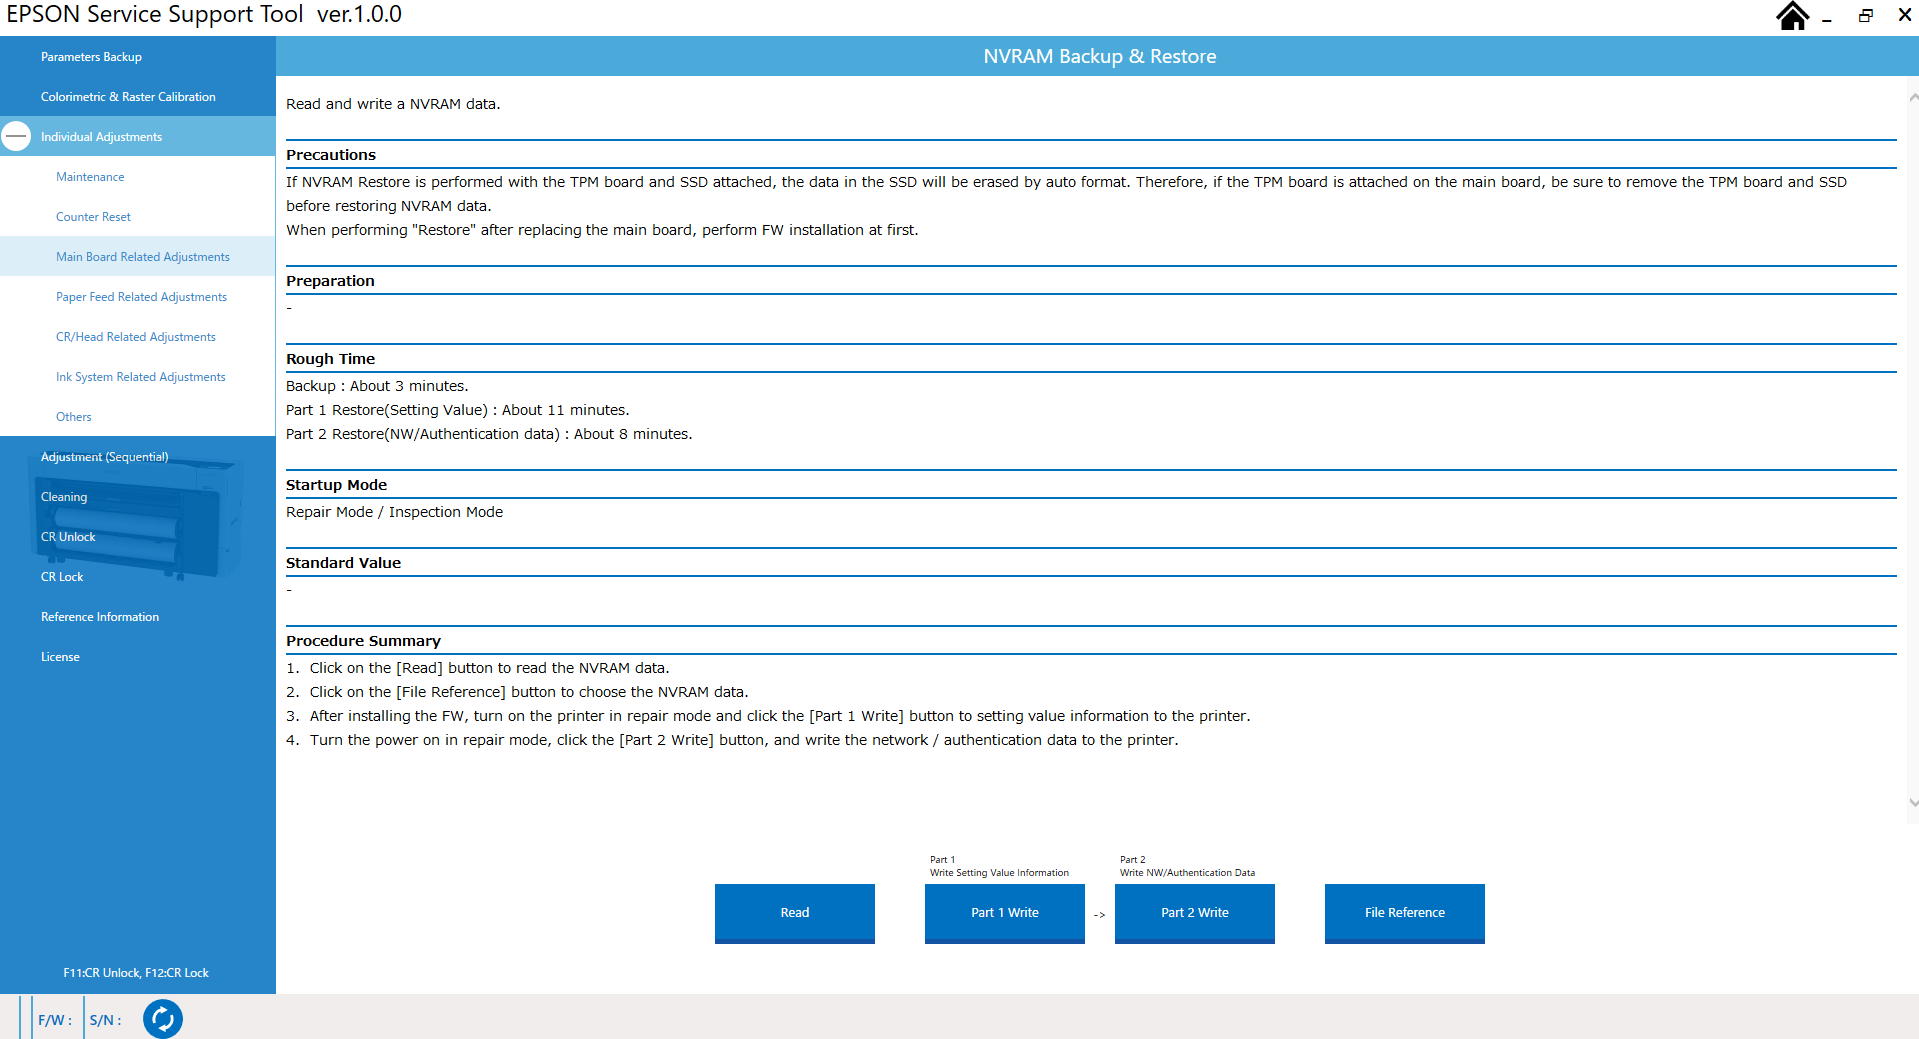
- Start the printer in repair mode. Turn the power on while touching [Screen Center], and keep pressing until the mode select screen is displayed. Touch the center of the panel to start repair mode.
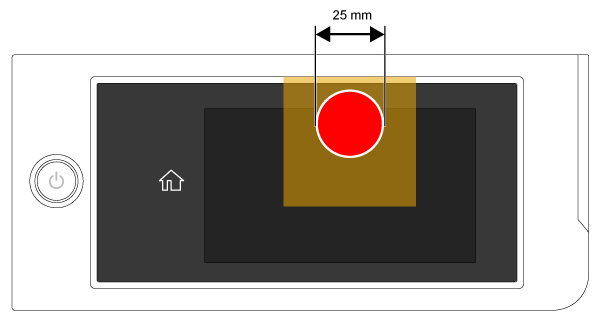
Start the Service Program, and select NVRAM Data Backup & Restore.
- Select the board for backing up the data.
Click the [Read] button to back up the NVRAM data.
 Caution / 注意
Parameter Backup and the [Read] data in NVRAM Data Backup & Restore are different. When repairing the Main Circuit Board, be sure to use the [Read] data of NVRAM Data Backup & Restore.
Restore
 Check Point / チェックポイント Check Point / チェックポイント |
When replacing either the Main circuit board or Main-B circuit board, be sure to perform Firmware Install. |
Press the power button. (If the power is turned on with a new board after replacing the main board, press the power button to automatically start in inspection mode.)
Start the Service Program, and select NVRAM Data Backup & Restore.
- Select the board to restore data.
To select NVRAM data to restore, click the [Browse] button, and select the file.
Caution / 注意The writing of the NVRAM data of another printer is prohibited because analysis is not possible.
Click the [Part 1 Write] button to write the setting value information to the main unit. The printer is turned off.
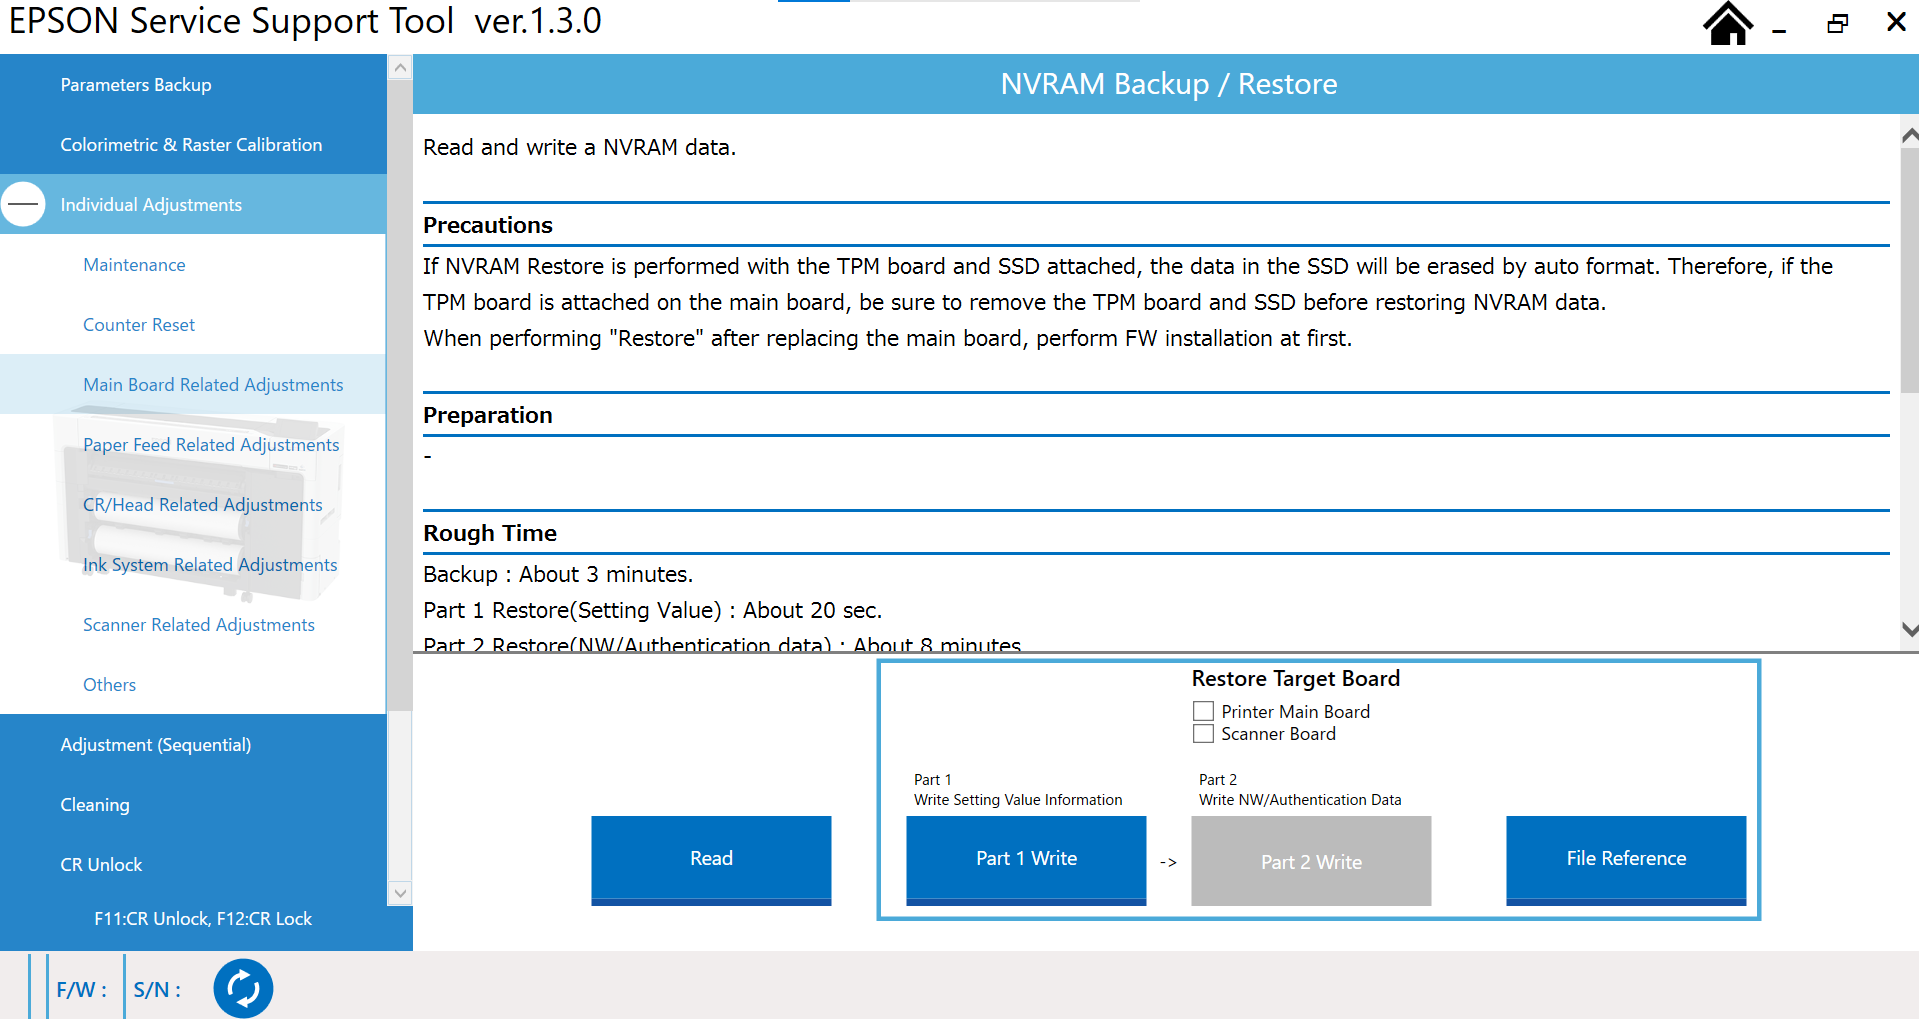
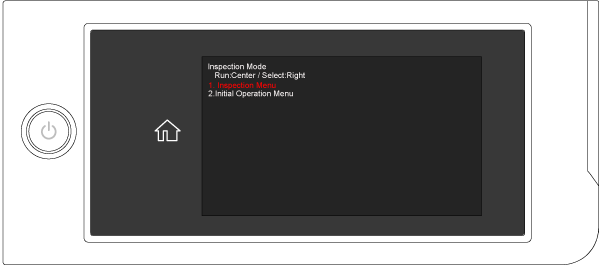
- Start the printer in inspection mode. Turn the power on while touching [Screen Left], and keep pressing until the mode select screen is displayed.
Select Inspection Menu. Check that “Inspection Menu” is shown in red, then touch the center of the touch panel.
Click the [Part 2 Write] button to write the NW/authentication data to the main unit. The printer is turned off.