CR Belt Deflection Adjustment
Required Tools
---
Estimate Time
Approx. 5 min.
Startup Mode
Repair mode
Standard Values
---
Step
Check
- Start the printer in repair mode. Turn the power on while touching [Screen Center], and keep pressing until the mode select screen is displayed. Touch the center of the panel to start repair mode.
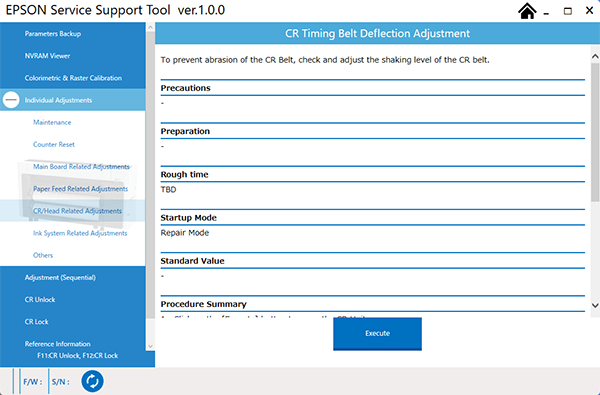
- Start the Service Program, and select CR Belt Deflection Adjustment.
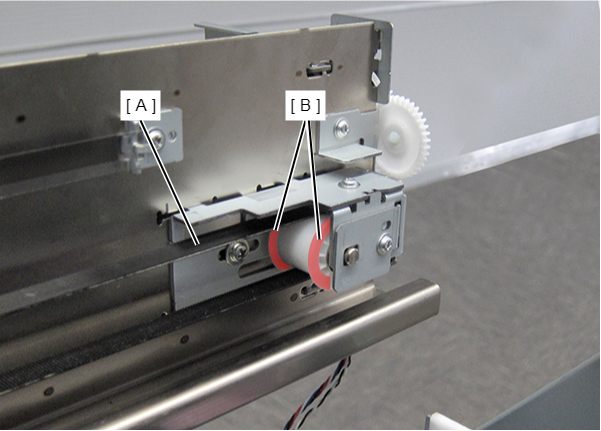
- Ensure the following parts are removed.
- Click the [Run] button to move the CR Unit.
- When the CR Unit is in operation, check that the CR Belt is not deviating towards or contacting either the front or rear flanges on the pulley. If this is not contacting, then confirmation is complete. If this is contacting, then go to "Adjustment" section.
- Click the [Complete] button.
Adjustment
- Turn off the printer.
- Turn the adjustment screw.
- Turn clockwise: Slant towards the front surface.
- Turn counter-clockwise: Slant towards the rear surface.
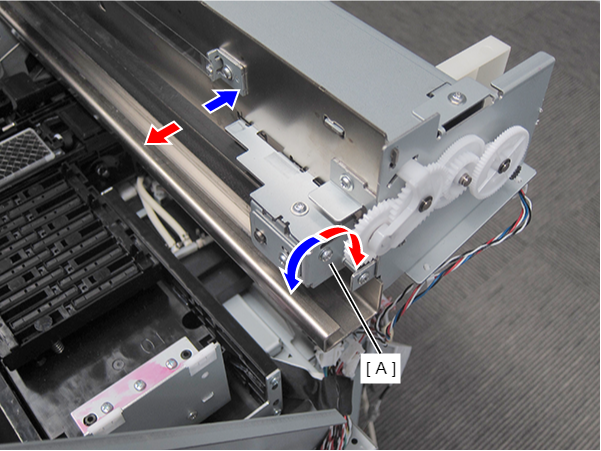
- Move the CR Unit back and forth once and check that there is no contact. If there is contact, make adjustments by turning the adjustment screw again.