Paper Feed Adjustment
 Caution / 注意 Caution / 注意 |
This adjustment is intended to match the adjustment standard in order to adjust the variation of the paper feeding accuracy for each machine. If this adjustment is performed on the media used by the user, the paper feed accuracy may be decreased for media other than the type of media for which the adjustment was made. Therefore, to adjust paper feed for the media that the user will use, perform “Paper Feed Correction” from the control panel. |
Required Tools
- Paper: PGPP250: Premium Glossy Photo Paper (250) that is 16 inches
- Scale (1,000mm)
Estimate Time
Approx. 10 min.
Startup Mode
Repair mode
Standard Values
508 ±0.075[mm](±0.015%)
Step
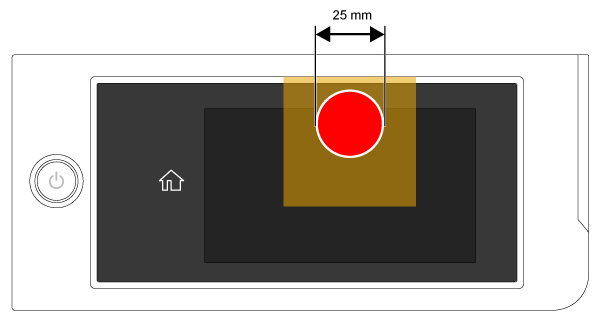
- Turn the power on while touching [Screen Center], and keep pressing until the mode select screen is displayed. Touch the center of the panel to start repair mode.
- Set the paper.
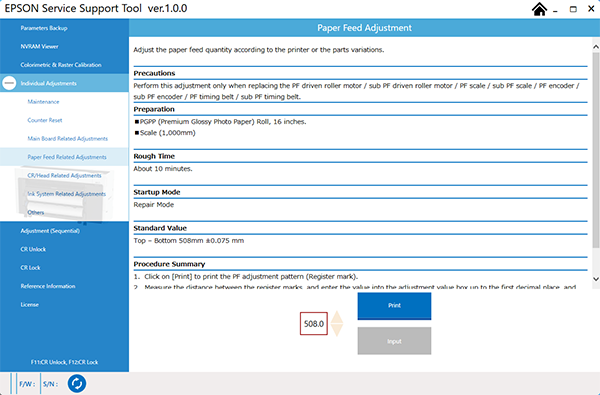
- Start the Service Program, and select PG Check& Adjustment.
- Click [Print] to print the PF adjustment pattern (Register mark).
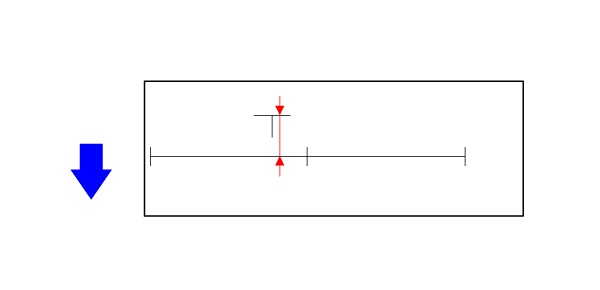
- Measure the distance between the register marks, and enter the value into the adjustment value box up to the first decimal place, and then click [Input]. (Example 999.9mm) (Paper is fed from the direction of the arrow.)
Turn the printer OFF to finish the adjustment.
 Check Point / チェックポイント
Be sure to power off the printer to enable the setting.