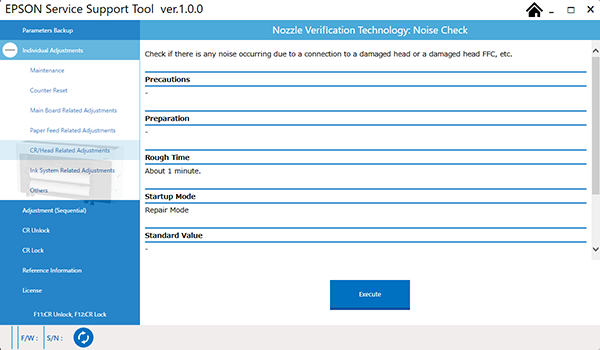
Nozzle Verification Technology Noise Check
Required Tools
PGPP250 that is more than 16 inches (Premium Glossy Photo Paper(250))
Estimate Time
Approx. 1 min.
Startup Mode
Repair mode
Standard Values
---
Step
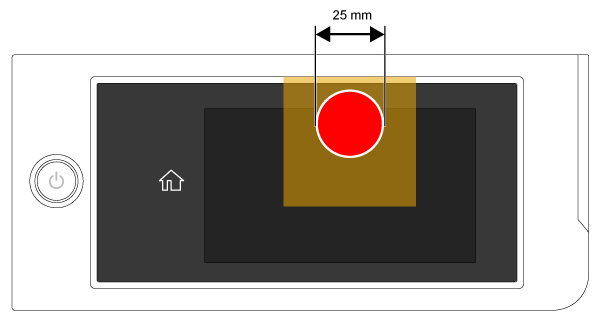
- Start the printer in repair mode. Turn the power on while touching [Screen Center], and keep pressing until the mode select screen is displayed. Touch the center of the panel to start repair mode.
Start the Service Program, and select Nozzle Verification Technology Noise Check.
Click the [Execute] button, and perform a noise check. The check will be performed automatically.
After performing the check, if [Successful] is displayed, click the [OK] button. If [Failed] is displayed, check that the Head FFC is connected correctly (incorrect insertion, slanted insertion, etc.). If this is still unsuccessful, replace the Head FFC or Print Head with a new one.