Head Slant Check & Adjustment (PF direction)
Required Tools
- PGPP250 that is more than 16 inches (Premium Glossy Photo Paper(250))
- Scale Loupe
Estimate Time
Automatic adjustment: Approx. 15 min.
Manual adjustment: Approx. 15 min.
Startup Mode
Repair mode
Standard Values
---
Checking Method
Automatic adjustment (confirm)
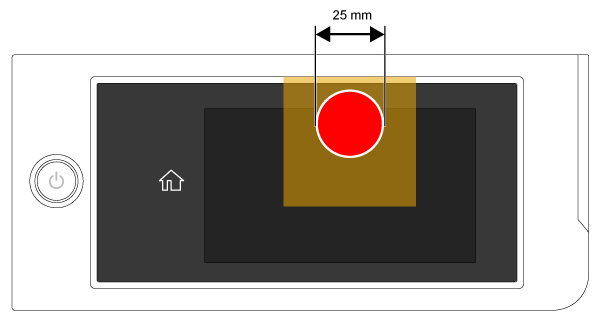
- Start the printer in repair mode. Turn the power on while touching [Screen Center], and keep pressing until the mode select screen is displayed. Touch the center of the panel to start repair mode.
- Set the adjustment media.
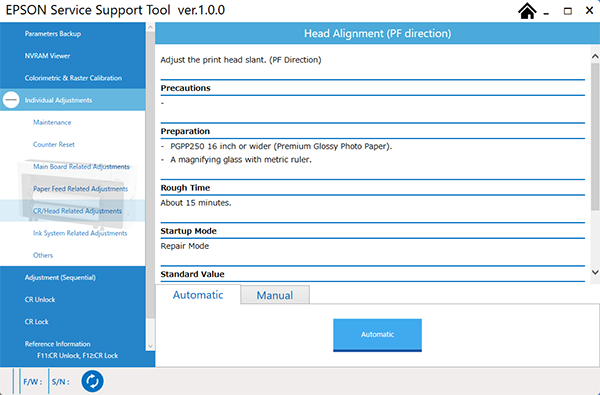
- From the Service Program, select Automatic Adjustment in Head Slant Check & Adjustment (PF direction).
- Click the [Automatic Adjustment] button. The adjustment pattern is printed.
- After printing, the Ink Mark Sensor will read the pattern, and if adjustment is required, the Head Slant Adjustment Lever notch number will be displayed.
- If adjustment is not required, then adjustment is completed. If adjustment is required, then adjust in reference to adjustment methods.
Automatic adjustment pattern
Paper is fed from the direction of the arrow.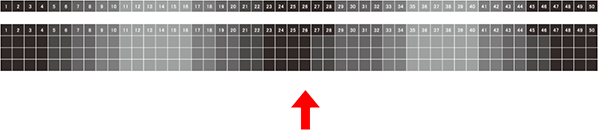
Manual adjustment (confirm)
- Start the printer in repair mode. Turn the power on while touching [Screen Center], and keep pressing until the mode select screen is displayed. Touch the center of the panel to start repair mode.
- Set the adjustment media.
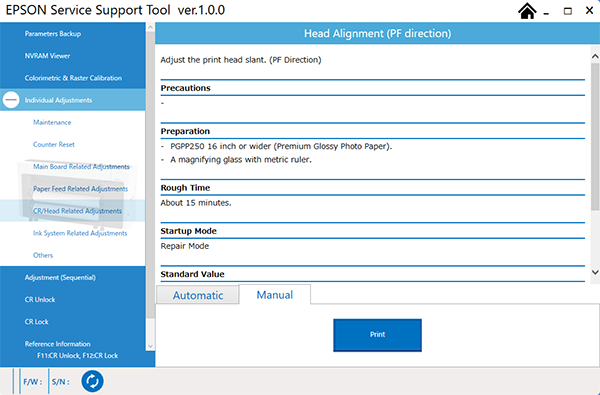
- From the Service Program, select Manual Adjustment in Head Slant Check & Adjustment (PF direction).
- Click the [Print] button. The adjustment pattern is printed.
- Check the printed pattern with a Scale Loupe, and determine if adjustment is required.
Adjustment pattern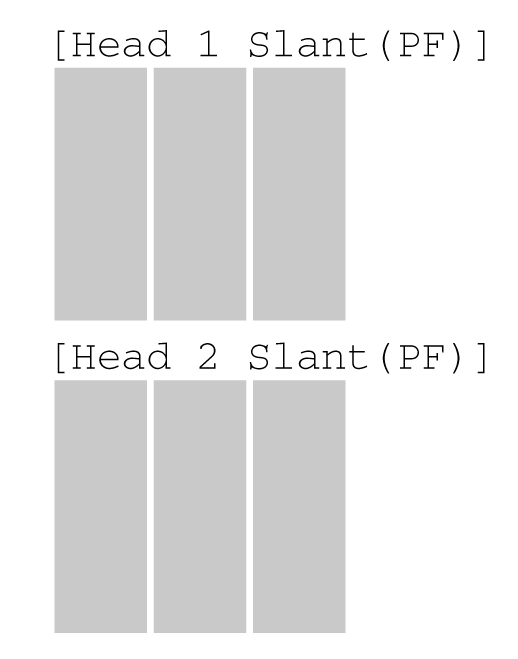
Determination
Different widths of the gap between left and right (A-B gap and C-D gap) are acceptable.
- If adjustment is not required, then adjustment is completed. If adjustment is required, perform adjustment.
Adjustment
- Ensure the following parts are removed.
- Move the CR Unit to the Full side.
If manual adjustment, then unlock the CR Unit from the Service Program before moving. - Turn the screw that secures the Head Slant Adjustment Lever (A) 1.5 times to loosen.

- Move the Head Slant Adjustment Lever (A) to adjust the head slant amount.
Move the number of notches displayed in the Service Program.
Ex.) If -6 steps is indicated, then rotate back 6 steps.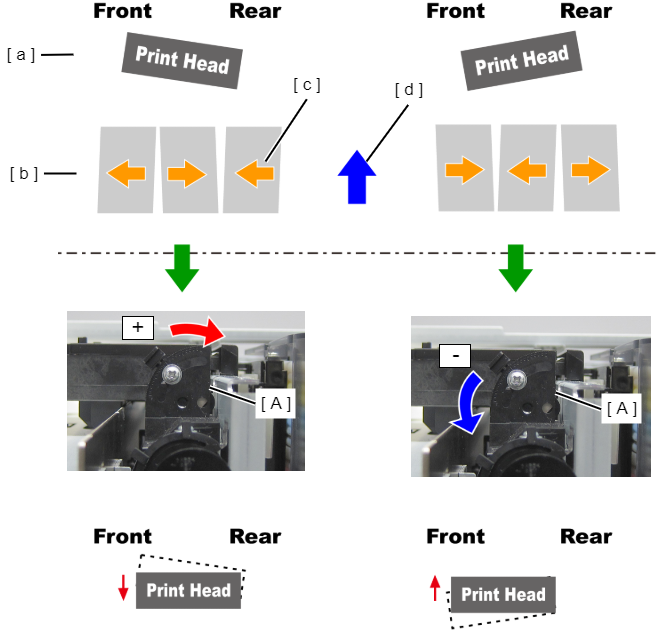
a: Head state
b: Pattern state
c: Pattern adjustment direction
d: Paper feed direction - Tighten the screw that secures the Head Slant Adjustment Lever.
- If automatic adjustment, click [OK] in the Service Program to lock the CR Unit. If manual adjustment, then lock the CR Unit from the Service Program.
- Perform adjustment again. Repeat adjustment and confirmation of results until adjustment is complete.