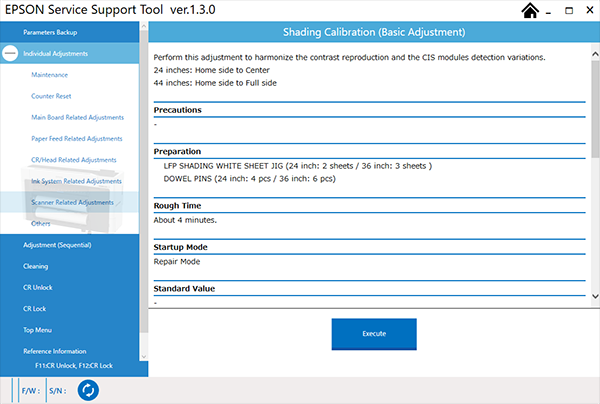
Shading Calibration (Basic Adjustment)
Required Tools
Shading Jig (Shading Jig)
Estimate Time
Approx. 4 min.
Startup Mode
Repair mode
Standard Values
---
Step
 Check Point / チェックポイント Check Point / チェックポイント |
If the scanner driver is not installed the PC, communication will not be possible printer and PC and an error will occur. Be sure to install the scanner driver before performing the service program. |
- Start the printer in repair mode. Turn the power on while touching [Screen Center], and keep pressing until the mode select screen is displayed. Touch the center of the panel to start repair mode.
- Start the Service Program, and select Shading Calibration (Basic Adjustment).
- Click the [Execute] button to open a separate window.
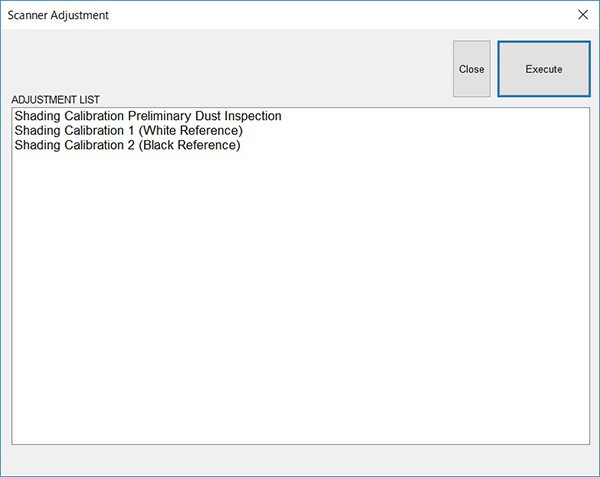
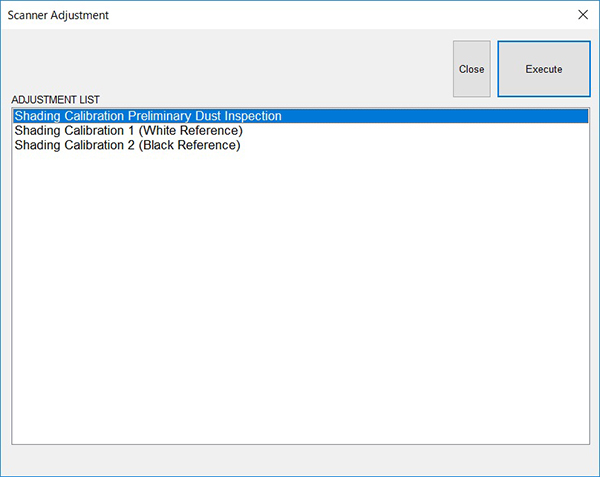
- Double-click Shading Calibration Preliminary Dust Inspection displayed in the separate window.
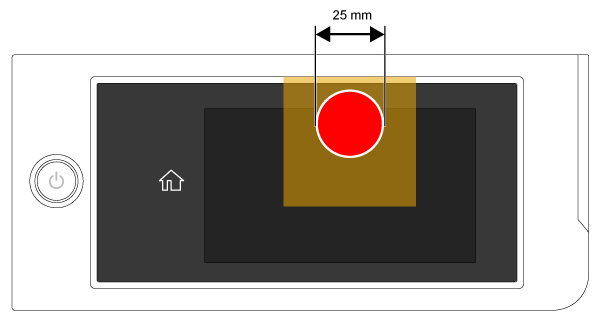
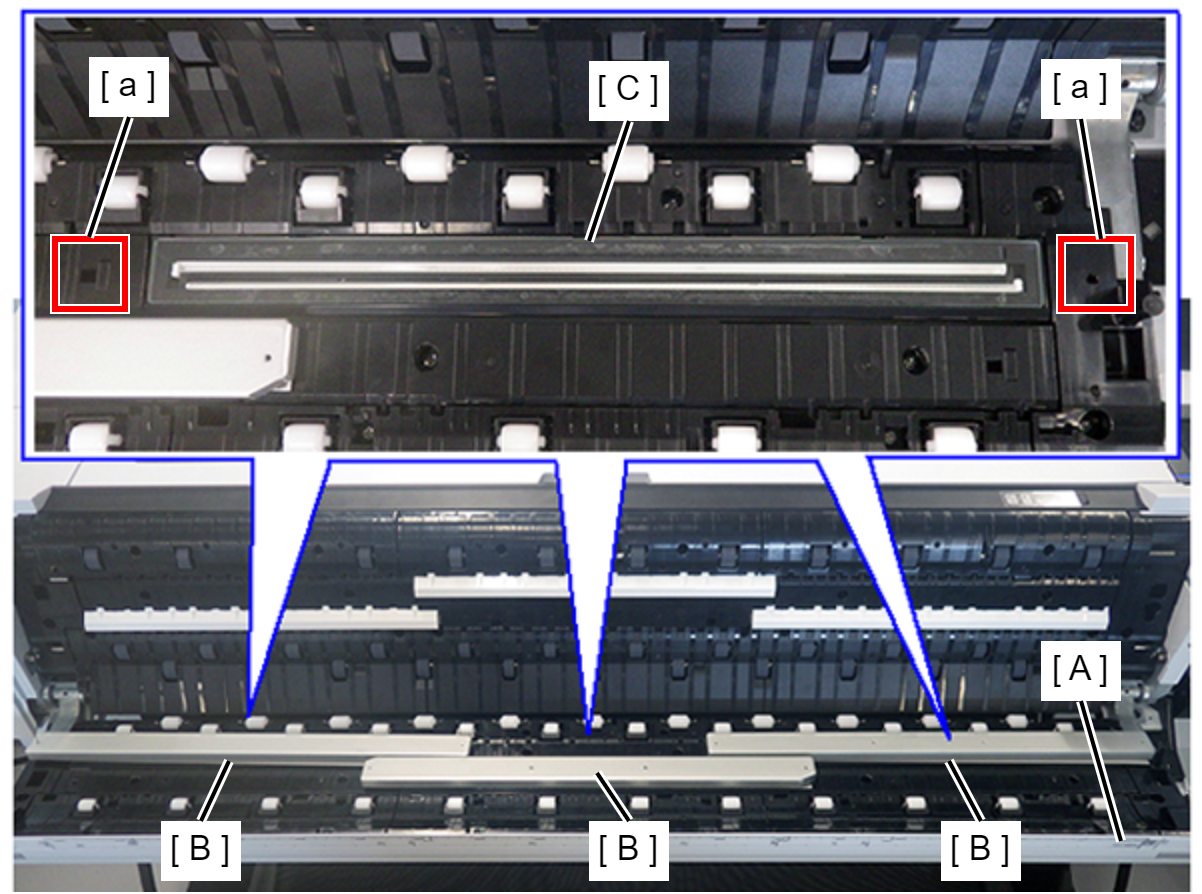
- Open the Scanner Unit (A) 90 degrees, and set Shading Jigs (B) on each CIS Module (C). (a: Pin Aligning Position)
 Check Point / チェックポイント
- Prepare the Shading Jig in advance. (Shading Jig)
- When opening the Scanner Unit 90 degrees, refer to the following and remove the Fixing Slider Left/Right.
Click the [OK] button displayed in the separate window. Foreign object detection is performed.
Respond in accordance with the displayed results.
Message List Description Supported Foreign object detected. Please clean the shading jig or the CIS module and try the adjustment again. Detects that there is a foreign object between the CIS Module and the Shading Jig. (Dust, ink smudges, etc.) 1. Clean the Scanner Unit and clean the corresponding CIS Module displayed in the message. 2. Check the condition of the corresponding Shading Jig shown in the message, and clean if dirty. the contamination is not removed even after cleaning, then replace the Shading Jig “LFP SHADING WHITE SHEET JIG”. (Shading Jig) 3. Perform foreign object detection before correction again. No abnormality detected. You may go ahead with the shading calibration. If there are no foreign objects. Go to Step 8. - Click the [OK] button displayed in the separate window.
- Double-click Shading Calibration 1 (White Reference) displayed in the separate window.
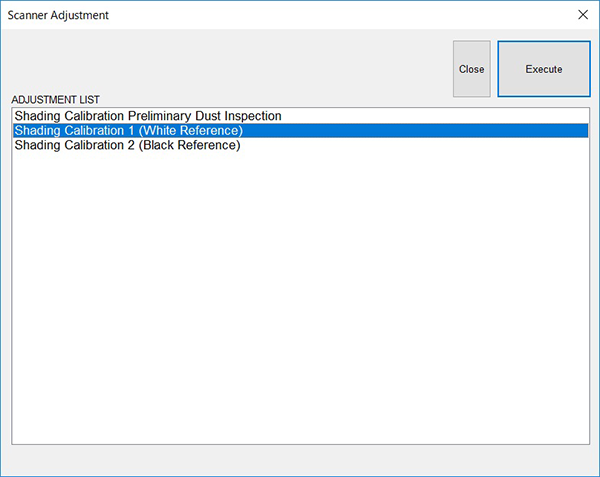
- Check that the Shading Jigs are set on the CIS Modules, and click the [OK] button in the separate window. Shading correction 1 is performed.
- When a success message is displayed, remove the Shading Jigs and close the Scanner Unit. Click the [OK] button.
- Double-click Shading Calibration 2 (Black Reference) displayed in the separate window.
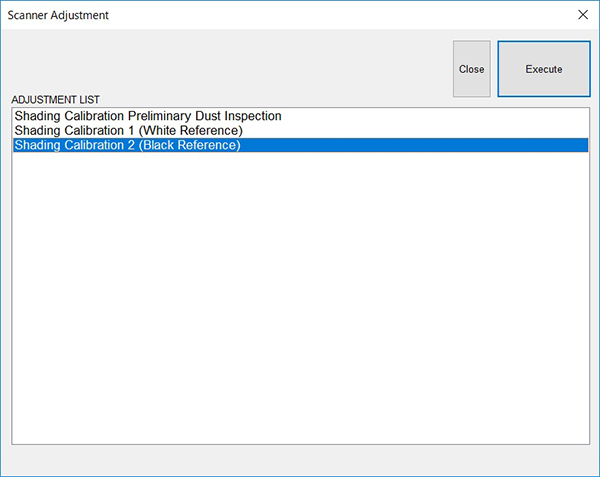
Click the [OK] button displayed in the separate window. Shading correction 2 is performed.
- When a success message is displayed, press the [OK] button.
- Close the separate window.