Head ID Check & Input
Required Tools
---
Estimate Time
Approx. 1 min.
Startup Mode
Inspection mode/Repair mode
Standard Values
---
Step
Start the printer in repair mode or inspection mode.
- Repair mode
Turn the power on while touching [Screen Center], and keep pressing until the mode select screen is displayed. Touch the center of the panel to start repair mode.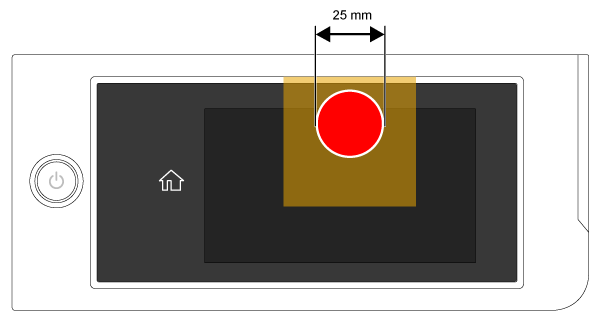
Inspection mode
Turn the power on while touching [Screen Left], and keep pressing until the mode select screen is displayed.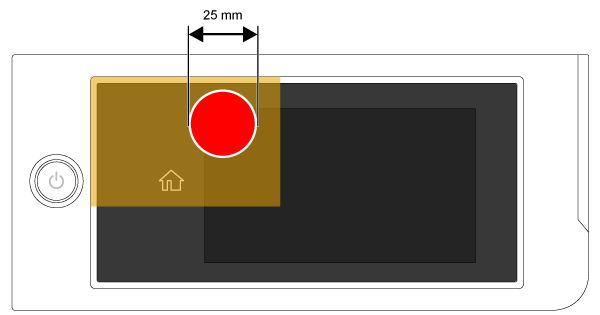
- Repair mode
- Start the Service Program, and select Head ID Check & Input.
- Click the [Input] button to automatically write the head ID, and turn the printer power off. (Click the [Confirm] button to display the written head ID.)
