Rear AD Adjustment (UPE)
Required Tools
Standard sheet (JETRAS)
Estimate Time
Approx. 1 min.
Startup Mode
Inspection mode
Standard Values
---
Step
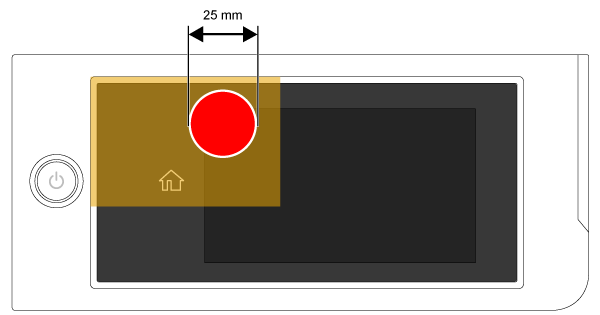
- Start the printer in inspection mode. Turn the power on while touching [Screen Left], and keep pressing until the mode select screen is displayed.
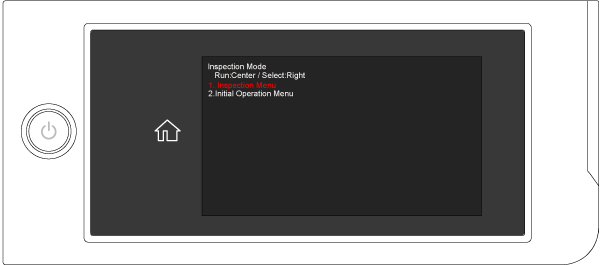
- Select Inspection Menu. InCheck that “Inspection Menu” is shown in red, then touch the center of the touch panel.
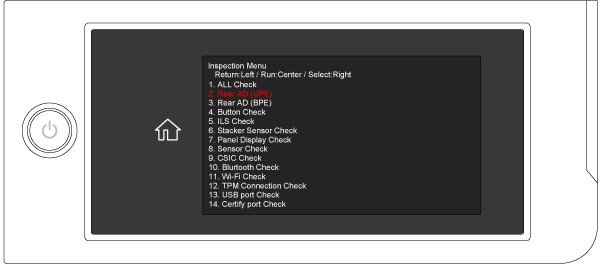
Touch the right on the panel to select Rear AD (UPE), and touch the center of the panel.
- Check that “Rear AD (UPE) OK?” is displayed, and touch the center of the panel.
- Check the Jig Paper Set OK? is displayed on the panel.
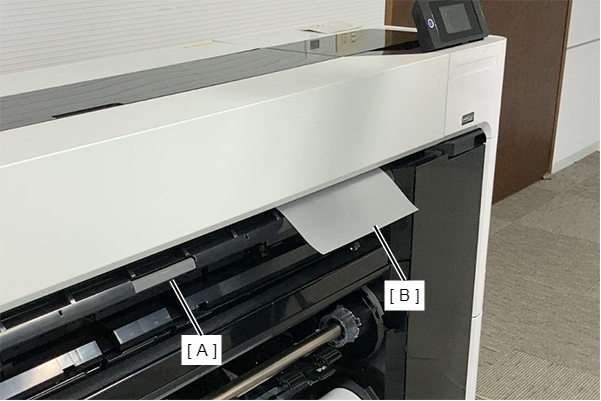
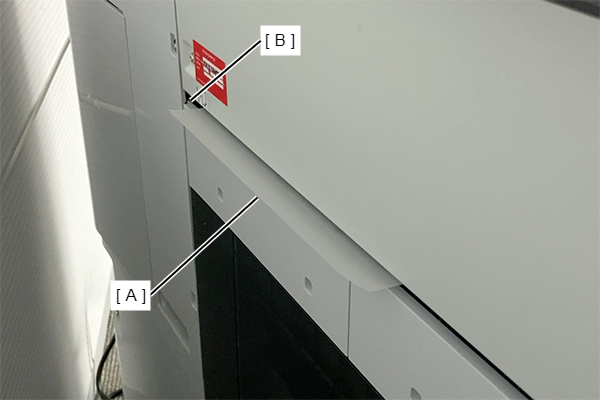
Raise the paper support (A), and insert a standard sheet (JETRAS) (B) into the manual feed slot.
 Caution / 注意
- Make sure to perform when the printer is turned OFF. Also, make sure to unplug the AC Inlet.
- Set the standard sheet (JETRAS) with its matte surface up.
- Check that the sheet (A) comes out through the paper ejection slot (B) on the rear.
- Touch the center of the touch panel. A value is displayed in a few seconds.
- When a value is displayed, touch the center of the panel.
Check the Jig Paper Remove OK? is displayed on the panel.
Remove the standard sheet (JETRAS) from manual feed slot, and then touch the center of the panel.
When “OK” is displayed, touch the center of the panel to finish the adjustment. If “Retry Rear AD Adjust” is displayed, check that the standard sheet (JETRAS) is not torn, and does not have dirt and creases, then restart the adjustment. If “Retry Rear AD Adjust” is still displayed, the UPE Sensor is faulty. Replace it and then perform the adjustment again.