T&B&S Check & Adjustment
Required Tools
- Top, Side adjustment: Archival Matte Paper A4 (Load the paper used for PW Sensor Check & Adjustment.)
- Bottom adjustment: Plain paper A3/Tabloid (11×17 inch)
- Scale
Estimate Time
Approx. 10 min.
Startup Mode
Repair mode
Standard Values
Top: 5 ± 0.4 mm
Side: 5 ± 0.4 mm
Bottom: 13.4 ± 0.3 mm
Step
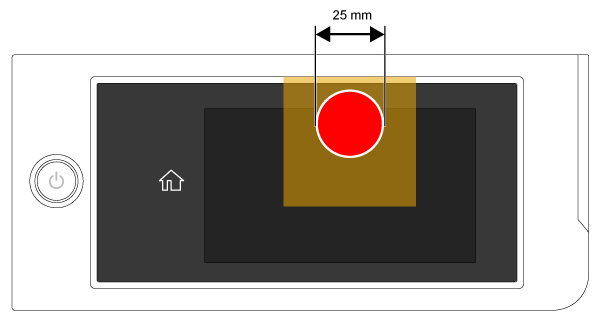
- Turn the power on while touching [Screen Center], and keep pressing until the mode select screen is displayed. Touch the center of the panel to start repair mode.
- Load the paper used for PW Sensor Check & Adjustment.
Start the Service Program, and select T&B&S Check & Adjustment.
Select the [Top, Side] tab and click the [Print] button to print the adjustment pattern.
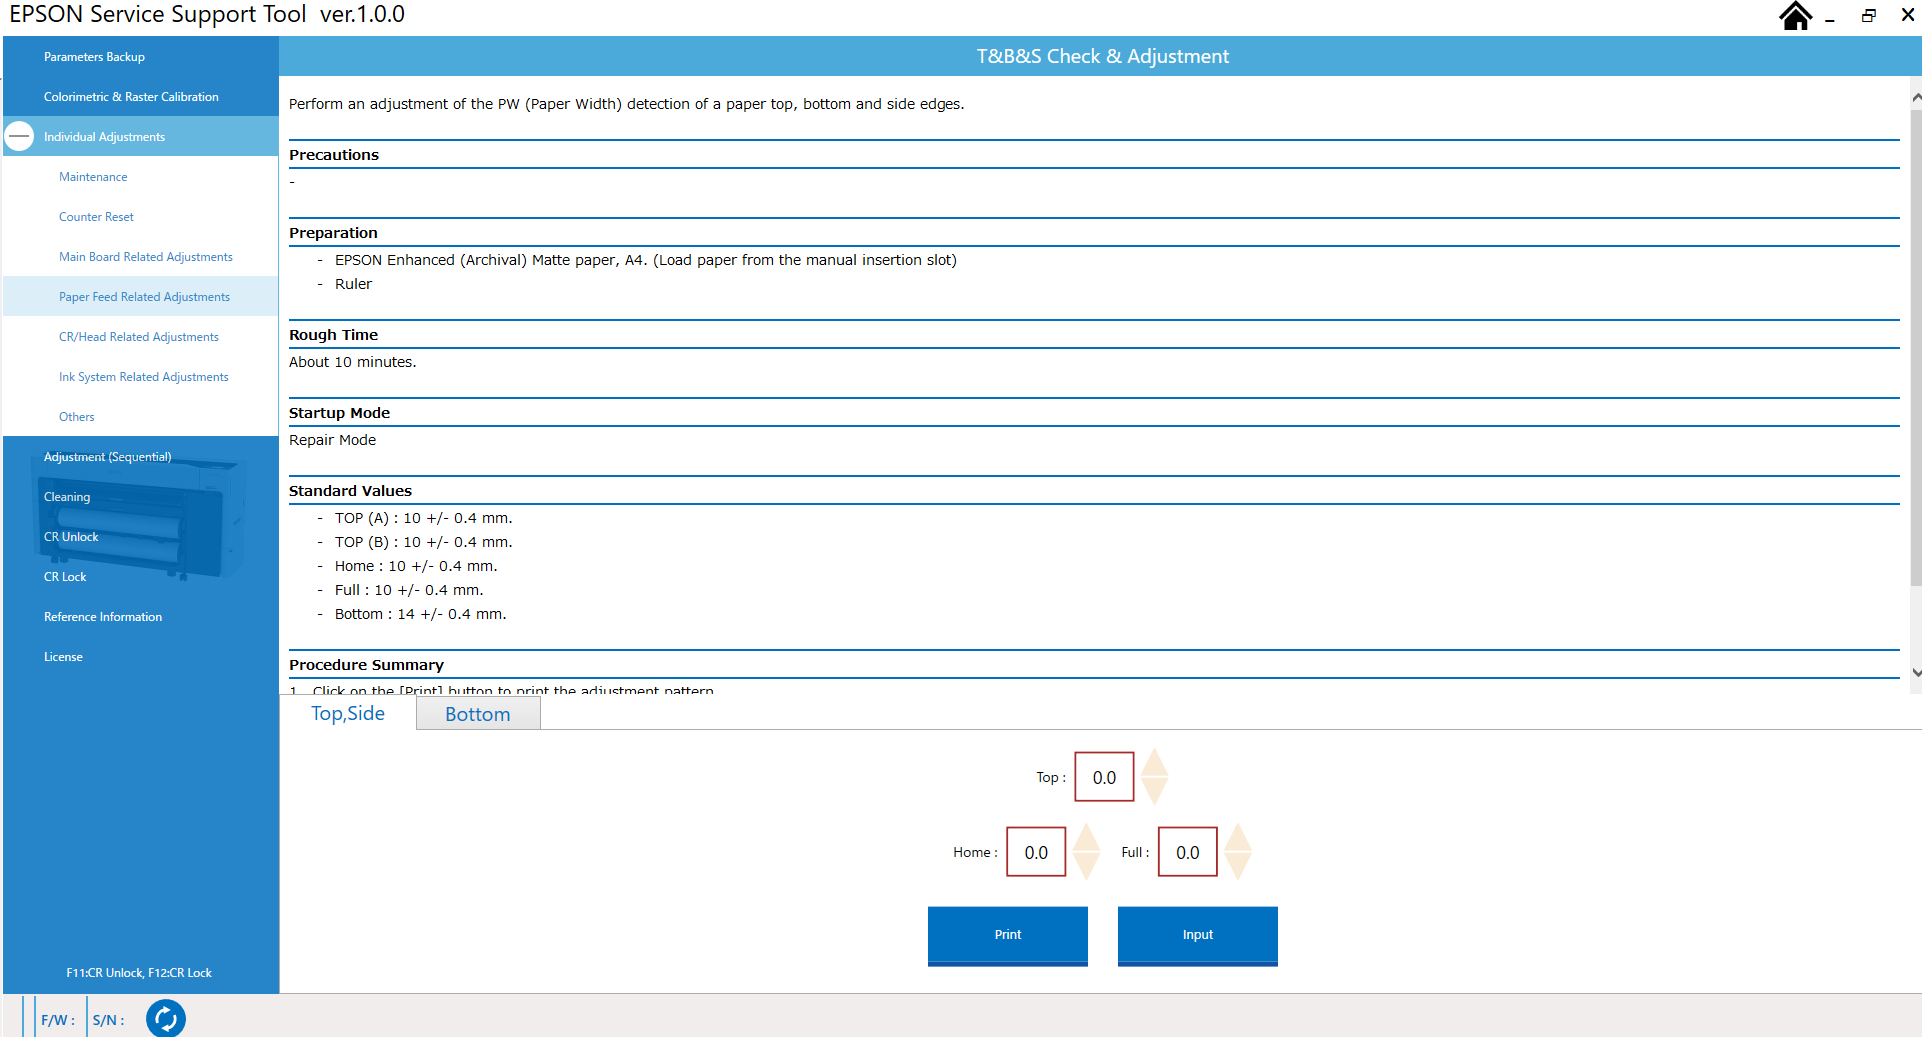
From the 3 lines (Top/Home/Full) in the printed adjustment pattern, input the number of the line printed 5 mm from each edge of the paper in input fields, or set by clicking the arrow on upper and lower sides of the input fields. (Blue arrow indicates the paper feeding direction.)
 Caution / 注意
Make sure to place the adjustment pattern on a flat place to measure the distances.
Click the [Input] button to write the adjustment value.
- Click the [Print] button again to print the adjustment pattern, and check that each 0 lines of Top/Home/Full are within the standard value from the edges of the paper. If not, try again from step 5.
- Set the Plain paper A3/Tabloid (11×17 inch).
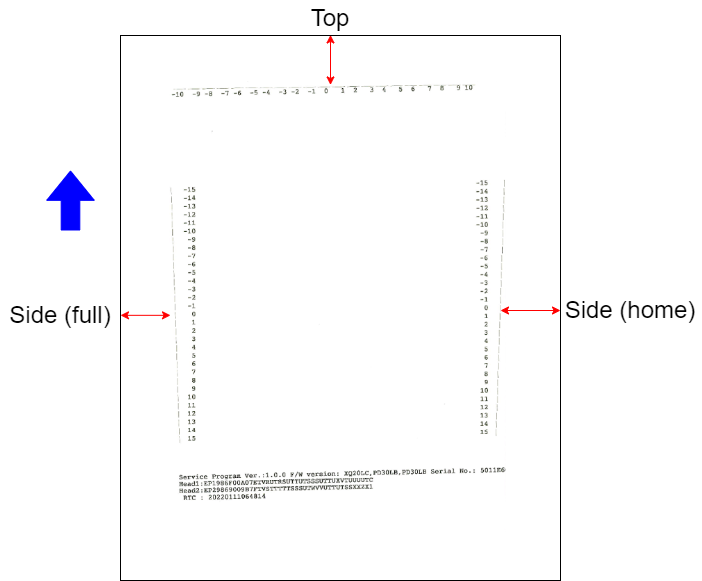
- Select the [Bottom] tab, select the set A3 or Tabloid with the radio button, and click the [Print] button to print the adjustment pattern.

Measure the distance at the position shown in the figure. (Paper is fed from the direction of the arrow.)
- Click the [Input] button to write the measurement value.
- Click the [Print] button again to print the adjustment pattern, and check that the line of Bottom is within the standard value from the edges of the paper. If not, try again from step 10.
- Turn the printer OFF to finish the adjustment.