Ruled Line Deviation Adjustment (Manual)
Required Tools
- Cut sheet paper feeding: PGPP250: Premium Glossy Photo Paper (250) that is 16 inches
- Roll paper feeding
- 44 inch machine: PGPP250: Premium Glossy Photo Paper (250) that is 44 inches
- 36 inch machine: PGPP250: Premium Glossy Photo Paper (250) that is 36 inches
- 24 inch machine: PGPP250: Premium Glossy Photo Paper (250) that is 24 inches
Estimate Time
- 1 print: Approx. 2 min.
- 1 time patter confirmation & adjustment: Approx. 5 min. (outward path/inward path each)
- 1 time total: Approx. 14 min.
- Total including confirmation: Approx. 27 min.
Startup Mode
Repair mode
Standard Values
---
Step
<When using Cut Sheet Paper (PGPP250 16 inches)>
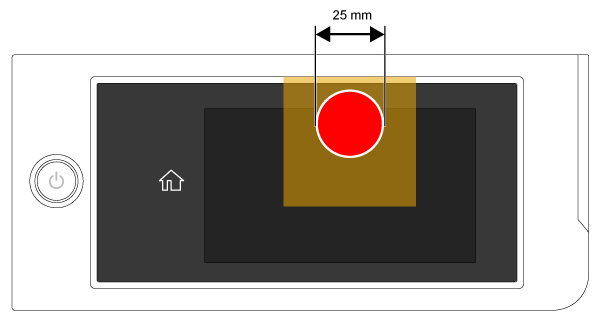
- Start the printer in repair mode. Turn the power on while touching [Screen Center], and keep pressing until the mode select screen is displayed. Touch the center of the panel to start repair mode.
Set the paper.
Start the Service Program, and select Automatic Adjustment in Ruled Line Deviation Adjustment.
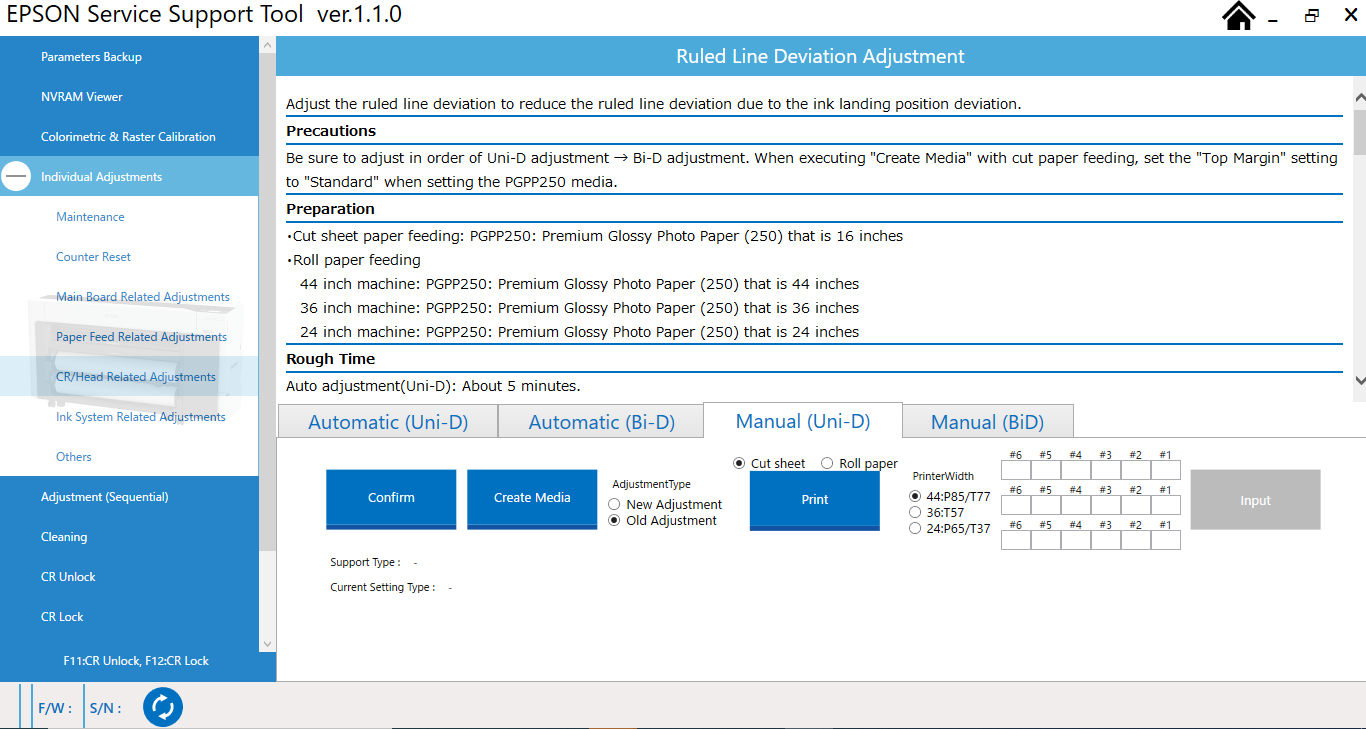
Select the [Manual adjustment (Uni-D)] tab, click [Confirm], and confirm the current configuration type.
Using the radio buttons, select the adjustment type from the current configuration types, and select [Cut Sheets].
Select 44: P85/T77, 36: T57, 24: P65/T37 for the product model, then click [Create Media].
Eject the role paper.
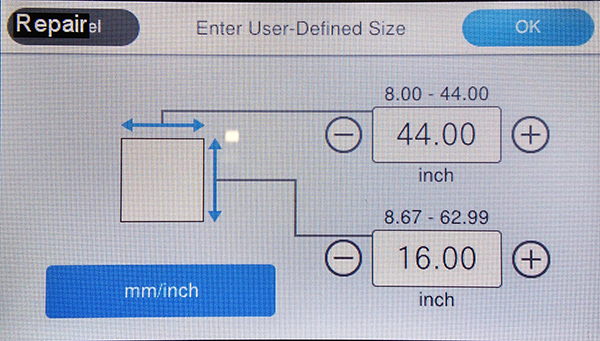
- Raise the paper support to the cut sheet paper feed position, and then set the created media to 44 inches wide and 16 inches long from Cut Sheet [User-Defined], and feed the paper.
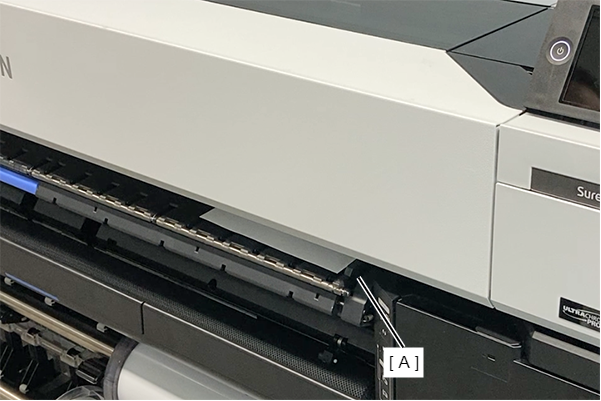
Set the cut sheet along the edge guide (A) on the paper support home side.
Click the [Print] button. The adjustment pattern is printed.
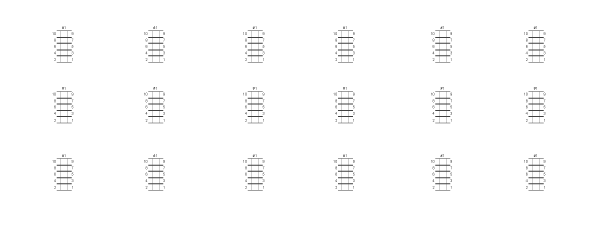
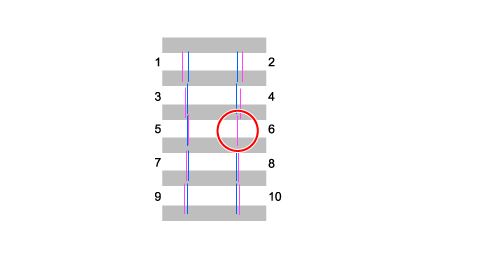
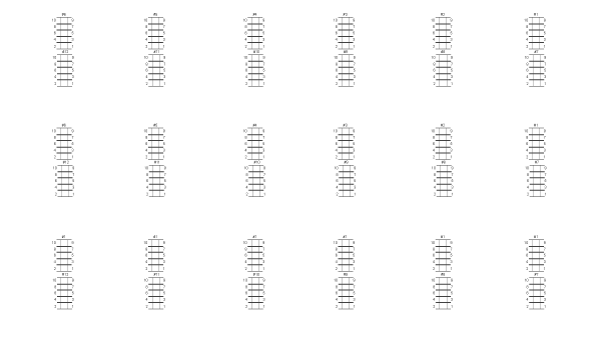
Select the pattern that lines are overlapping the most from each pattern, and enter the number in the program.
Click the [Input] button after finished entering.
In the same manner, Select [Manual Adjustment (Bi-D)], perform the Manual Adjustment (Bi-D).
 Check Point / チェックポイント
If the adjustment fails or the pattern is misaligned even after the adjustment, the adjustment is repeated until the pattern matches.
<When using each size Roll Paper>
- Start the printer in repair mode. Turn the power on while touching [Screen Center], and keep pressing until the mode select screen is displayed. Touch the center of the panel to start repair mode.
- Set the PGPP250 according to the size of the machine and feed it.
- Start the Service Program, and select Automatic Adjustment in Ruled Line Deviation Adjustment.
- Select the [Manual adjustment (Uni-D)] tab, click [Confirm], and confirm the current configuration type.
- Using the radio buttons, select the adjustment type from the current configuration types, and using the radio buttons, select [Roll Paper].
- Select 44:P85/T77, 36:T57, 24:P65/T37 for the product model, then click [Print] button.
- The adjustment pattern is printed.
- Select the pattern that lines are overlapping the most from each pattern, and enter the number in the program.
Click the [Input] button after finished entering.
- In the same manner, Select [Manual Adjustment (Bi-D)], perform the Manual Adjustment (Bi-D).Check Point / チェックポイント
If the adjustment fails or the pattern is misaligned even after the adjustment, the adjustment is repeated until the pattern matches.