Head angular mecha adjustment
Required Tool
- Photo matte paper (A4)
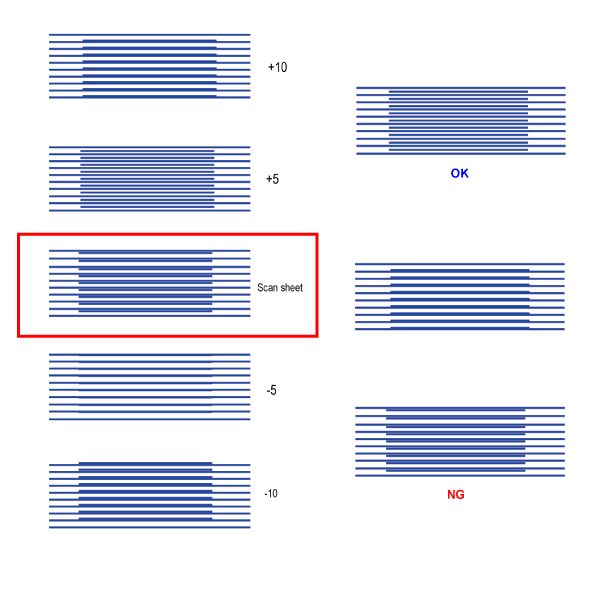
Adjustment pattern
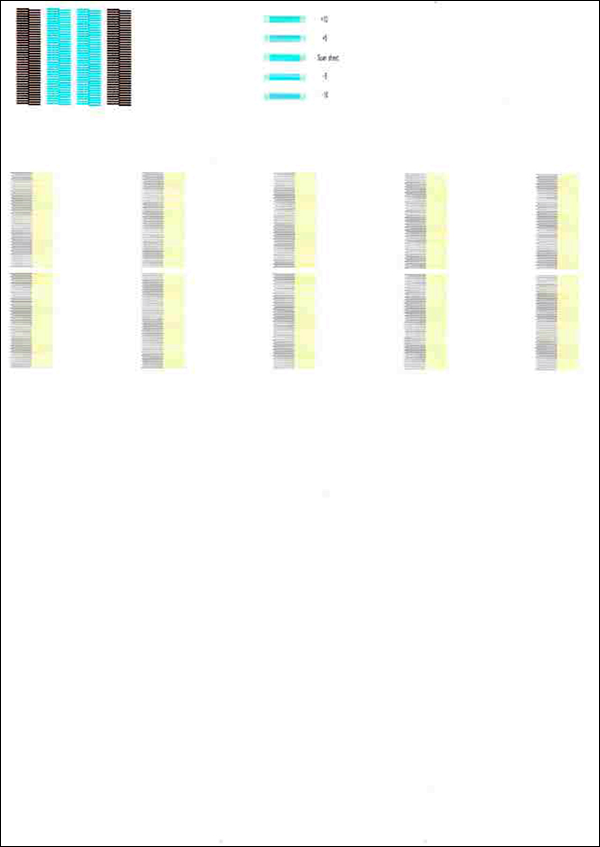
Judgment
Check the pattern that has “Scan sheet” printed, and adjust in order that there is an even gap between lines in the pattern.
Preparation
You may want to perform this Head angular mecha adjustment without the ADF/SCN Unit or with the unit opened.
Therefore, in order to set the ADF/SCN Open Sensor to the closed state, secure it with tape.
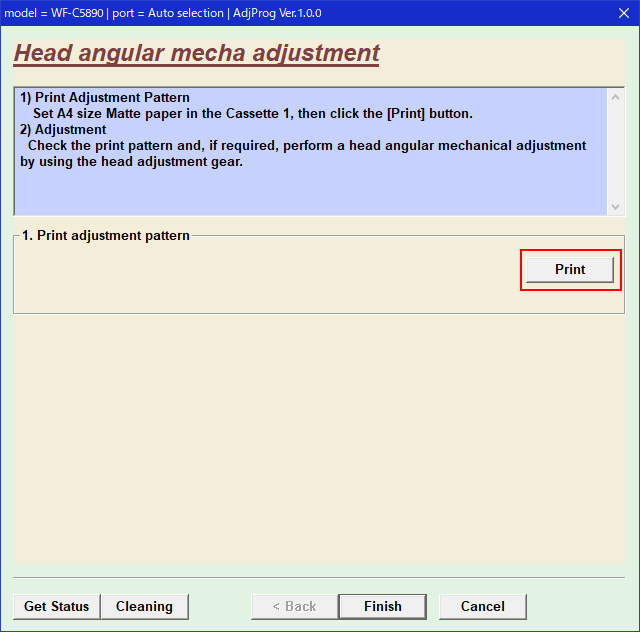
Procedure
- Start the Adjustment Program, and select the “Head angular mecha adjustment”.
- Load paper into the Paper Cassette (C1).
- Press the Print button to print the adjustment pattern.
- Check the adjustment pattern that has “Scan sheet” printed (current value), and predict the adjustment value to achieve the OK pattern (equal line gaps) shown in the figure below.
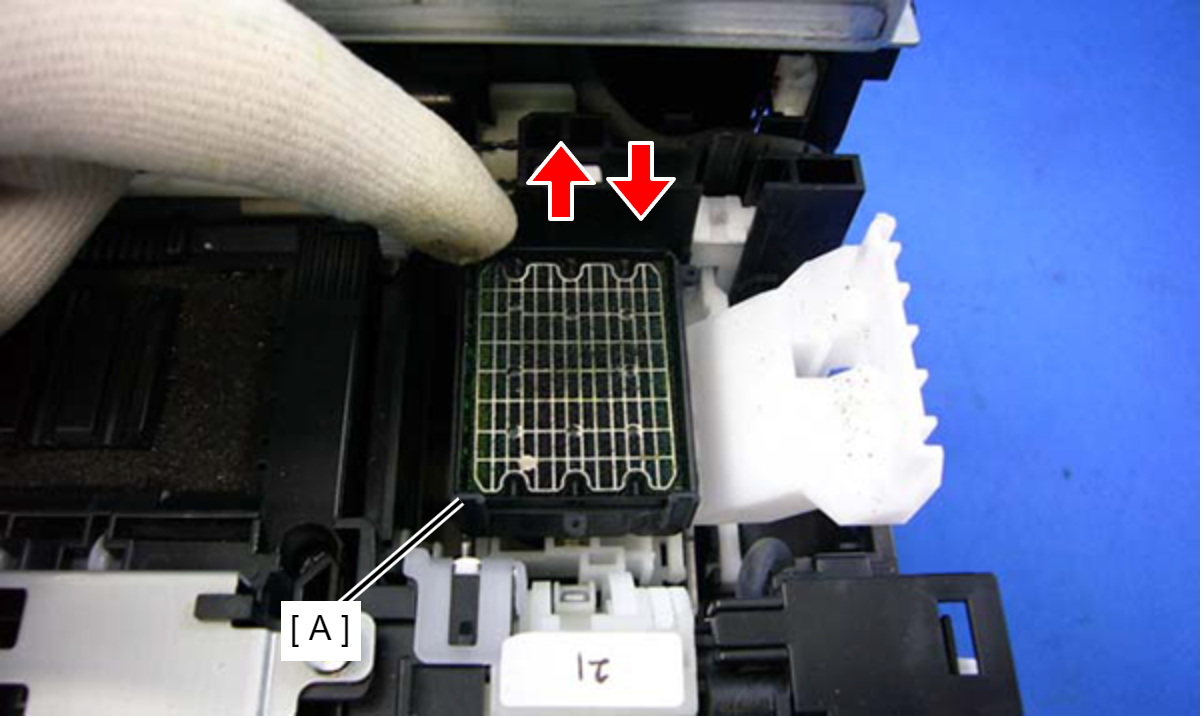
- Turn the printer off, and turn the gear (B) of the Ink System Unit (A) by hand as shown below to release the CR lock, moving the CR Unit (C) to the center position.
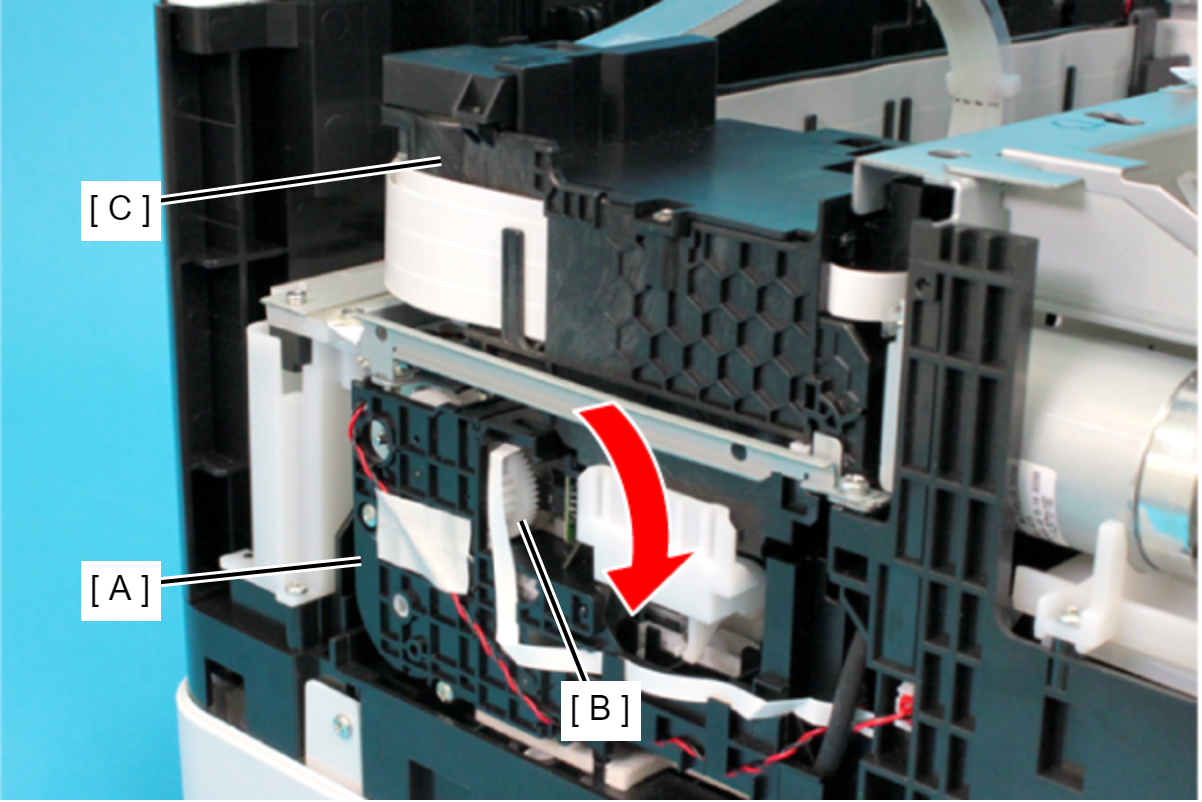
 Caution / 注意
When rotating the gear of the Ink System Unit, take extra care not to damage or disconnect the FFC by touching it.
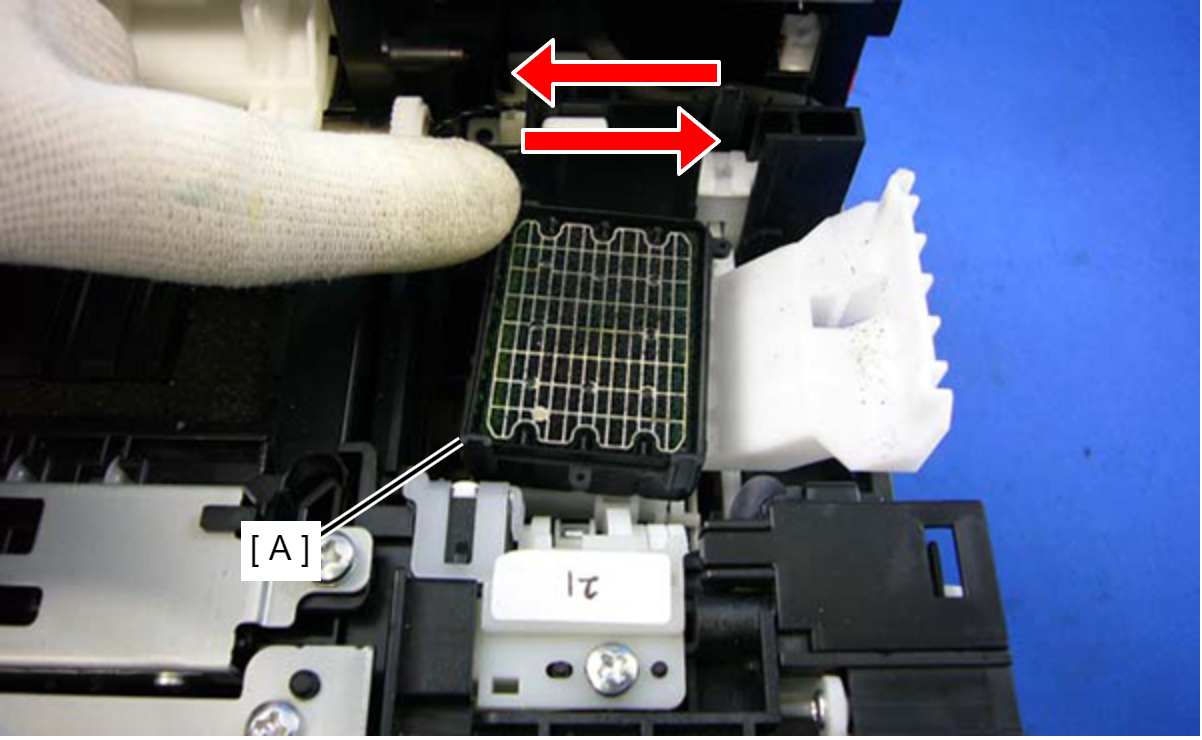
Turn the screws (×3) holding the Printhead (B) counter clockwise by 90° to loosen, and move the Head Angular Adjustment dial (C) on the CR Unit (A) in accordance with the forecast adjustment value from Step 5.
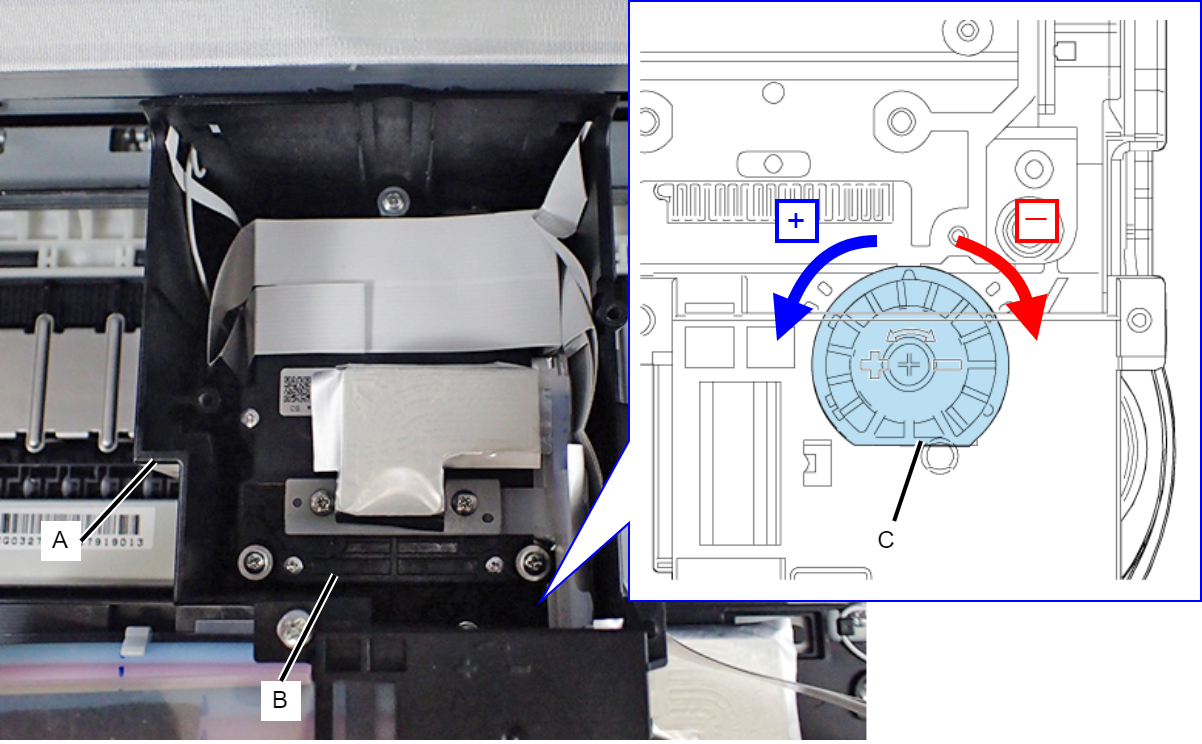
- Tighten the screw(x3) and move the CR Unit to the home position.
- Turn the printer on again, and print the adjustment pattern.
- Check the adjustment pattern “Scan sheet” (current value), and check that the gaps between the lines are even.
- If the line spacing is equal: The adjustment is completed.
- If the line spacing is not equal: Check the misalignment direction (“+” direction/“-” direction), then go to Step 10.
- Carry out Step 6 and Step 7, and move the Adjustment dial 1 notch in the direction confirmed in Step 9.
- Tighten the screws, and repeat Step 8 through Step 11 until the gap between the lines is equal.
| Caution / 注意 |
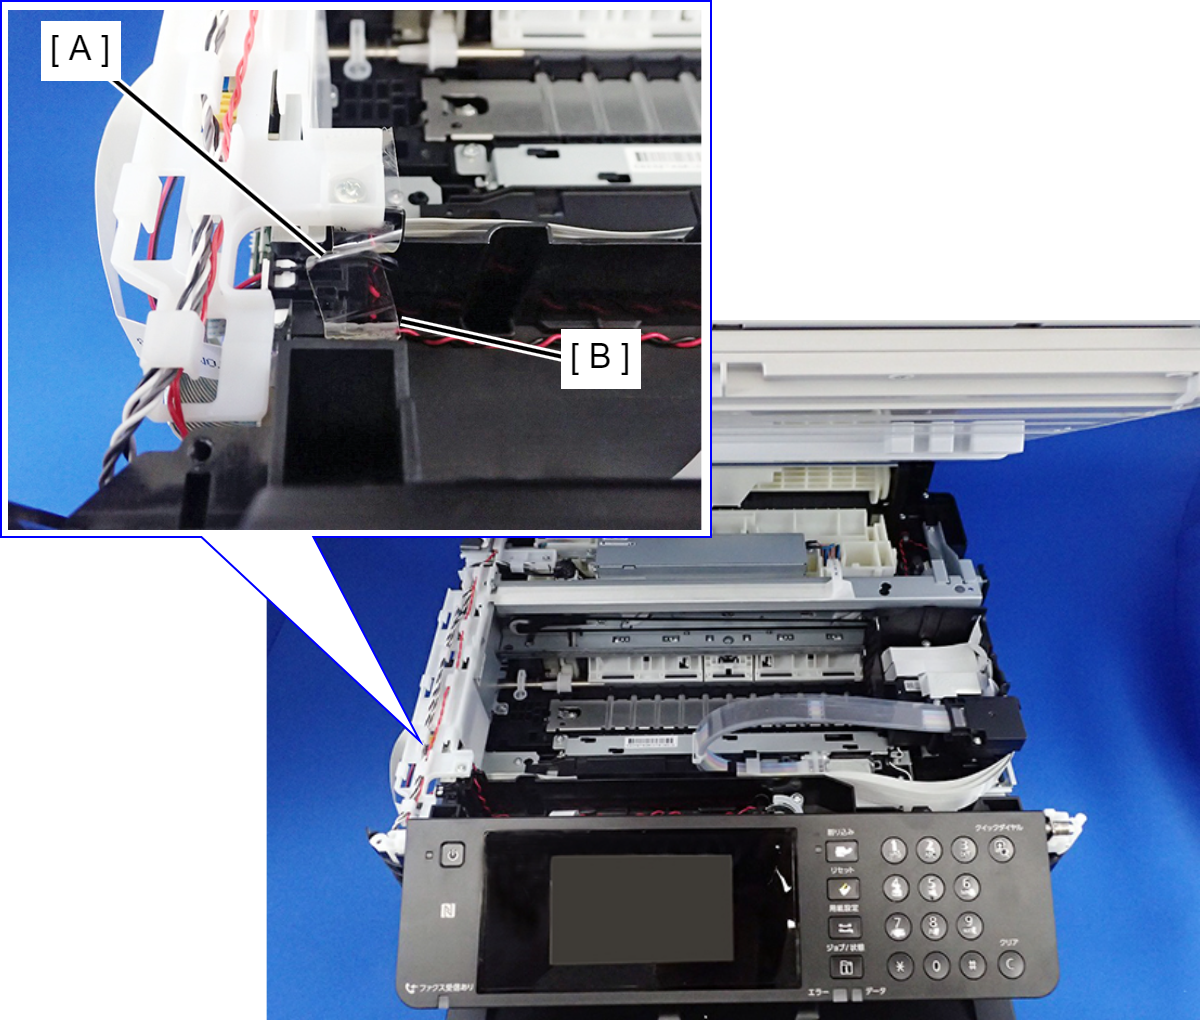
After carrying out a head angular mecha adjustment, make sure to confirm the operation of the cap of the ink system by the following procedure.
|